Step 1: Subscribe to MarsProxies Services
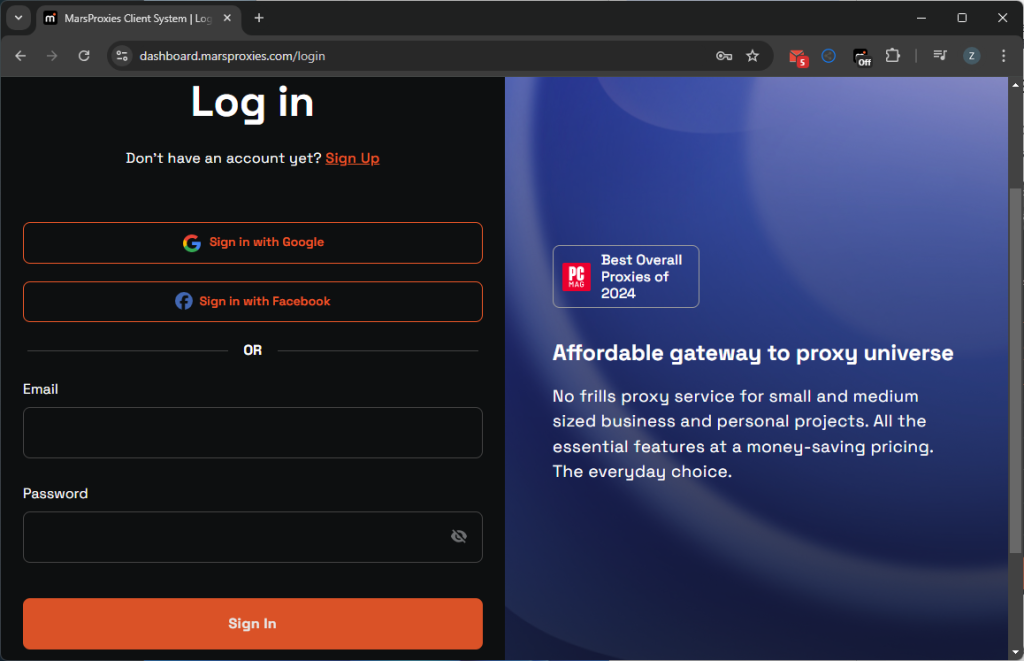
Firstly, set up a MarsProxies account. Go to the MarsProxies website and create an account.
Step 2: Buy Required Proxy Bandwidth
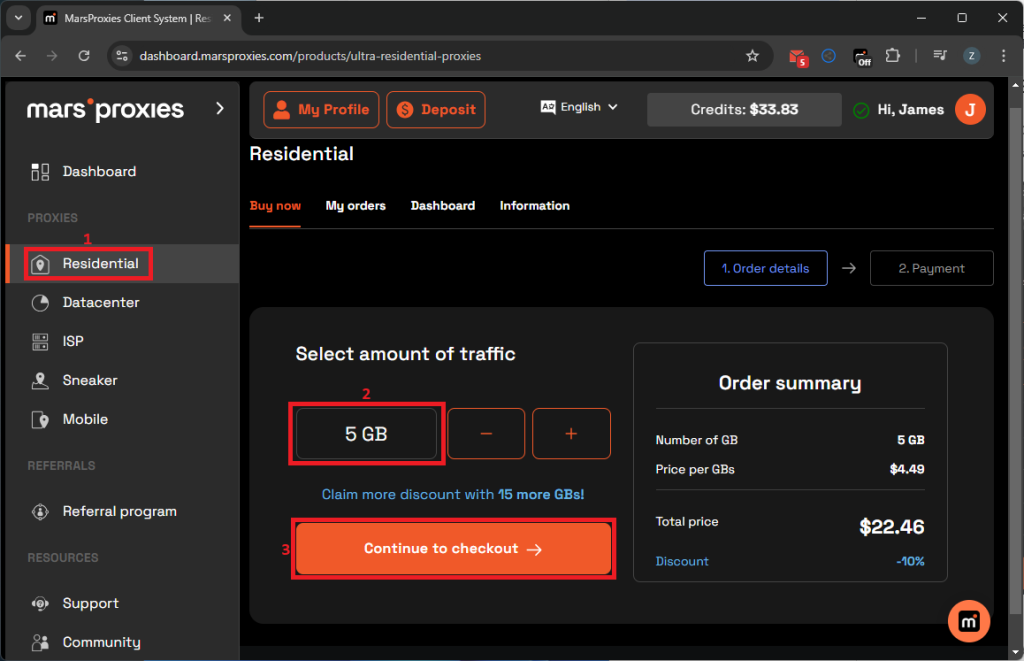
1. Log in with your credentials and choose the proxy type you wish to order from the menu on the left. We will use MarsProxies residential proxy servers. Click on Residential (1), choose the amount of traffic (2), and proceed to checkout (3).
Step 3: Generate Your Proxy Credentials
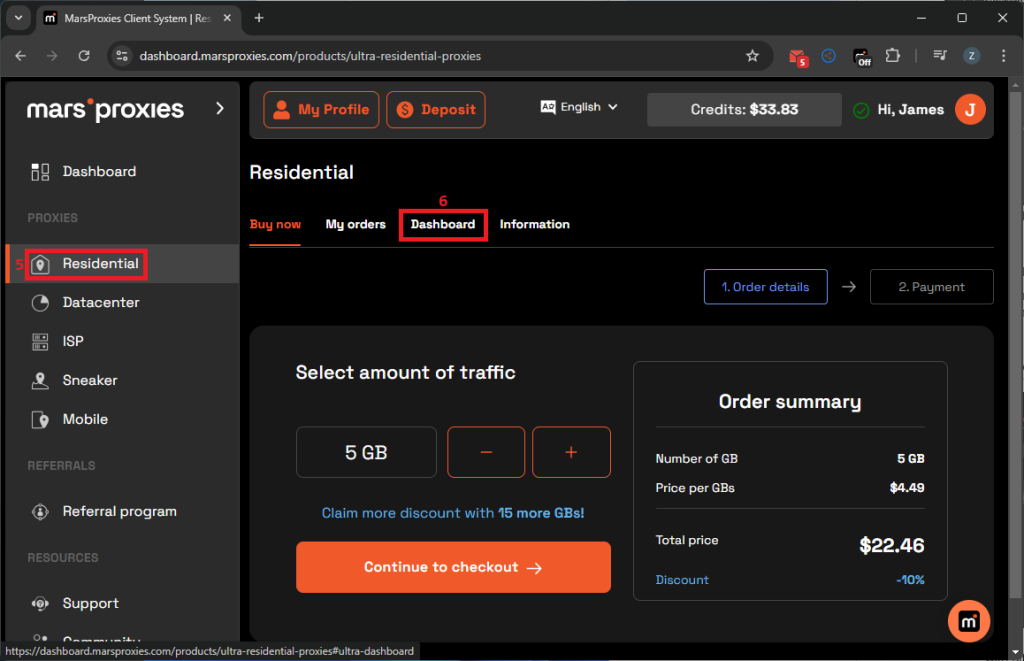
1. After finalizing your purchase, click on the Residential (5) section again and choose the Dashboard (6) tab.
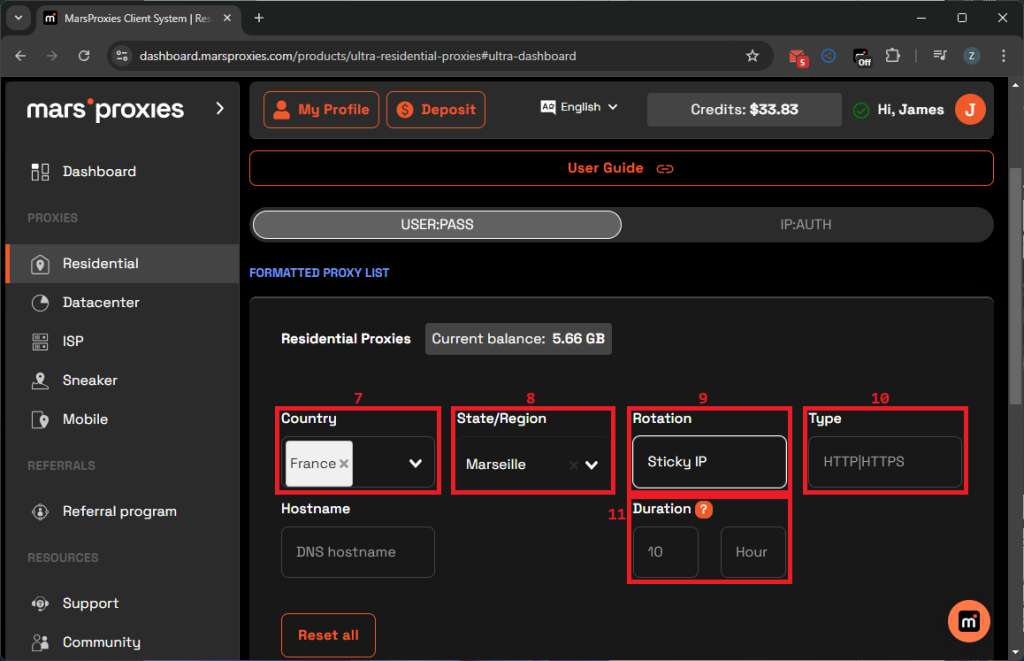
2. Here, you must configure your proxy - choose the country (7), state/region (8), rotation (9), proxy type (10), and session duration (11) if you’re using sticky IP sessions. Your dashboard should look like this.
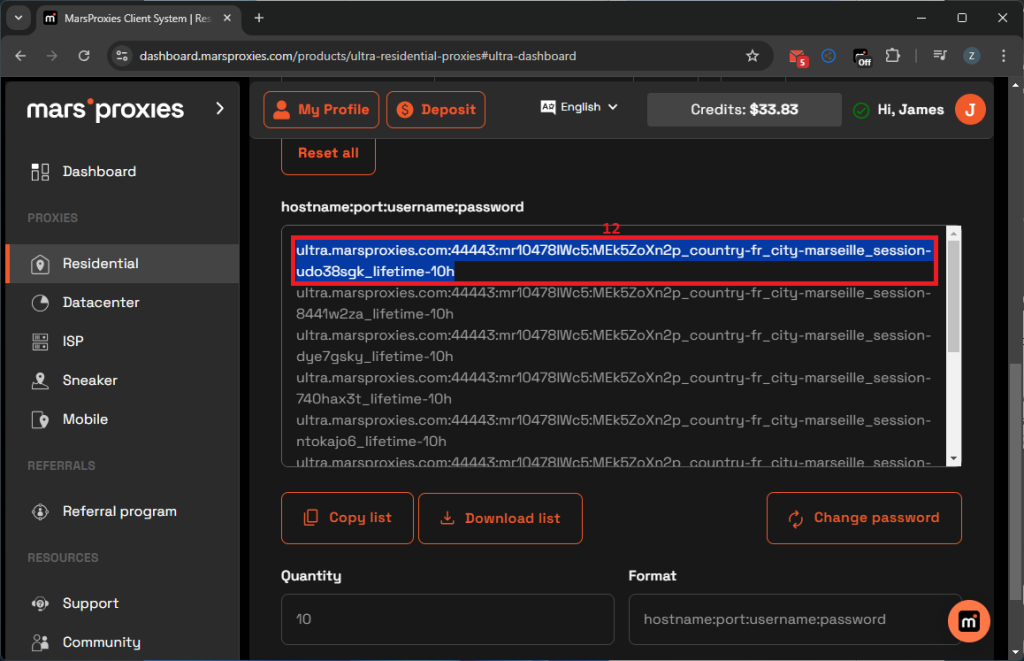
3. Notice the hostname:port:username:password table at the bottom. Each string here is a unique string of proxy credentials. Copy any string (12) to your clipboard.
Step 4: Download and Launch XLogin
We're all done on the MarsProxies dashboard. If you don't have XLogin yet, go to our official website and download it.

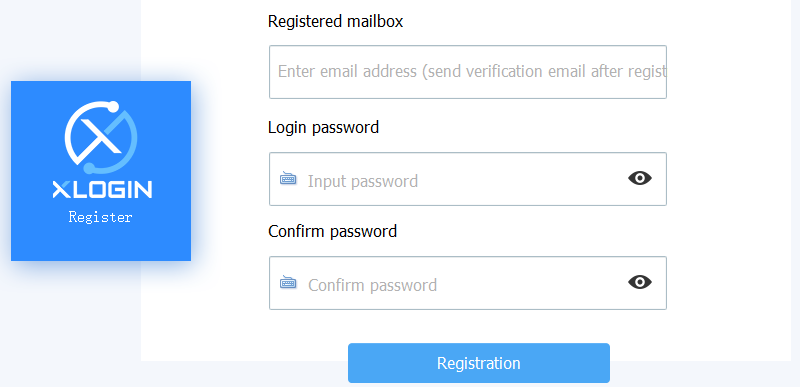
2. Launch XLogin and create an account. Keep in mind that we have a 3-day free trial to test the service out!
3. Log in with your credentials. Now, you’re ready to set up a new browser profile with a MarsProxies proxy IP address.
Step 5: Import Proxy Settings
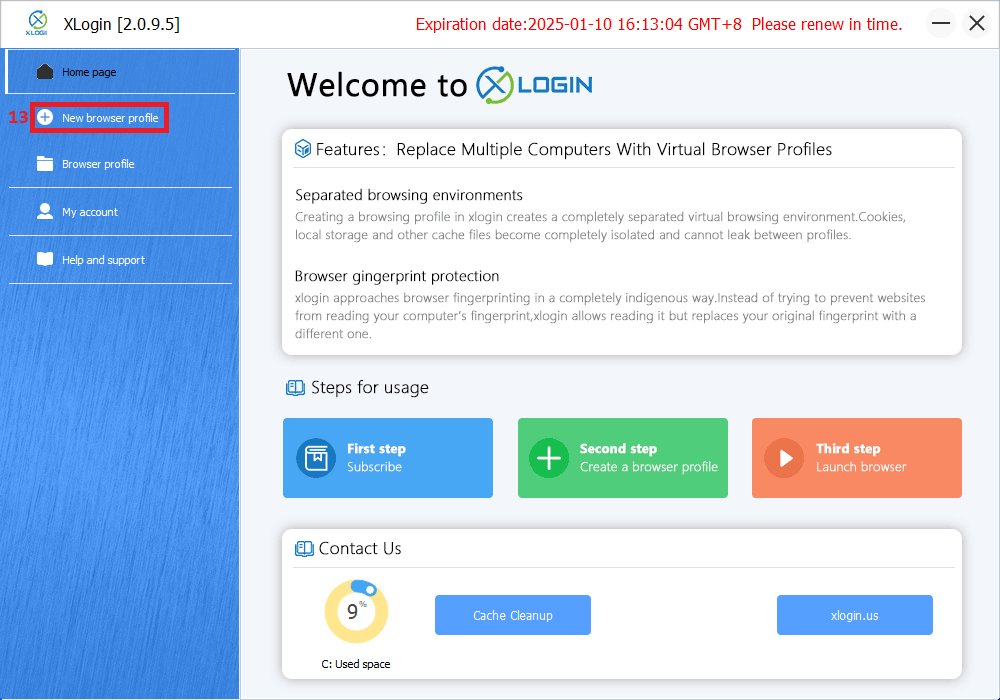
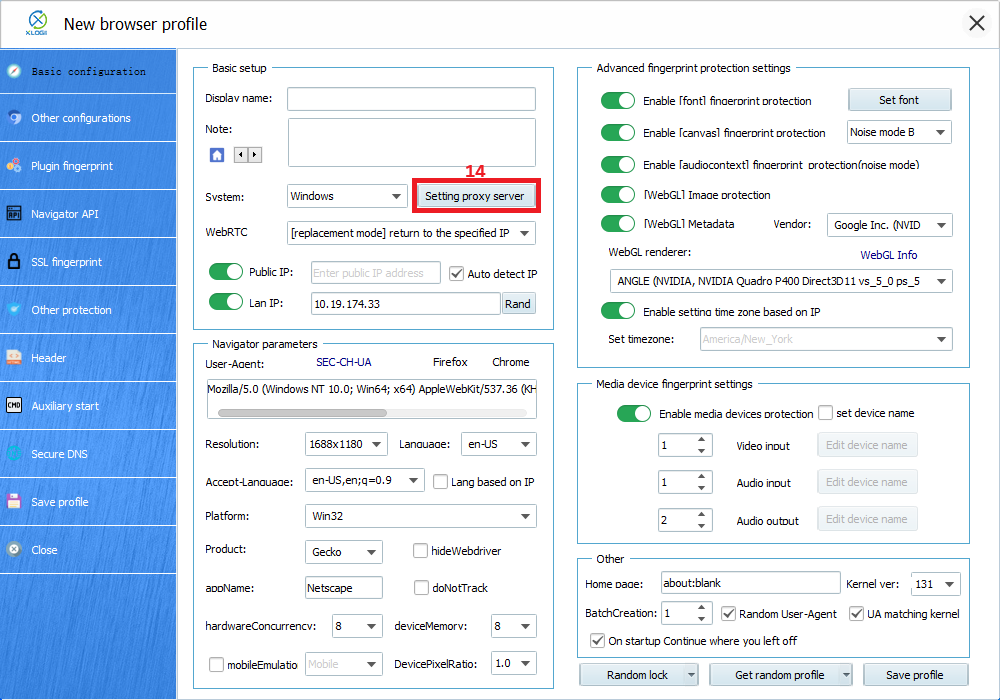
1. Click on the New browser profile (13) on the left side of the XLogin dashboard.
2. You will land on the Basic configuration screen. Click the Setting proxy server (14) button, as seen in the image below.
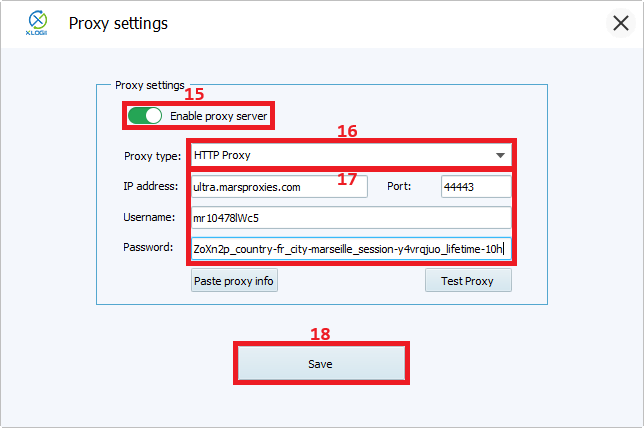
3. Now, be sure you have copied the MarsProxies proxy server credentials, as informed in step 3. You can simply click Paste proxy info, and XLogin will autofill the details. Toggle the Enable proxy server (15), select HTTP in the Proxy type (16) field, autofill the credentials (17), and click the Save (18) button.
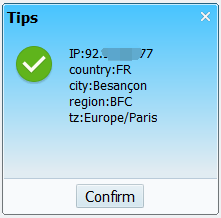
4. To be absolutely sure, you can also click the Test Proxy button before saving the settings to ensure everything goes smoothly. Here's what we got using our French proxy server as an example.
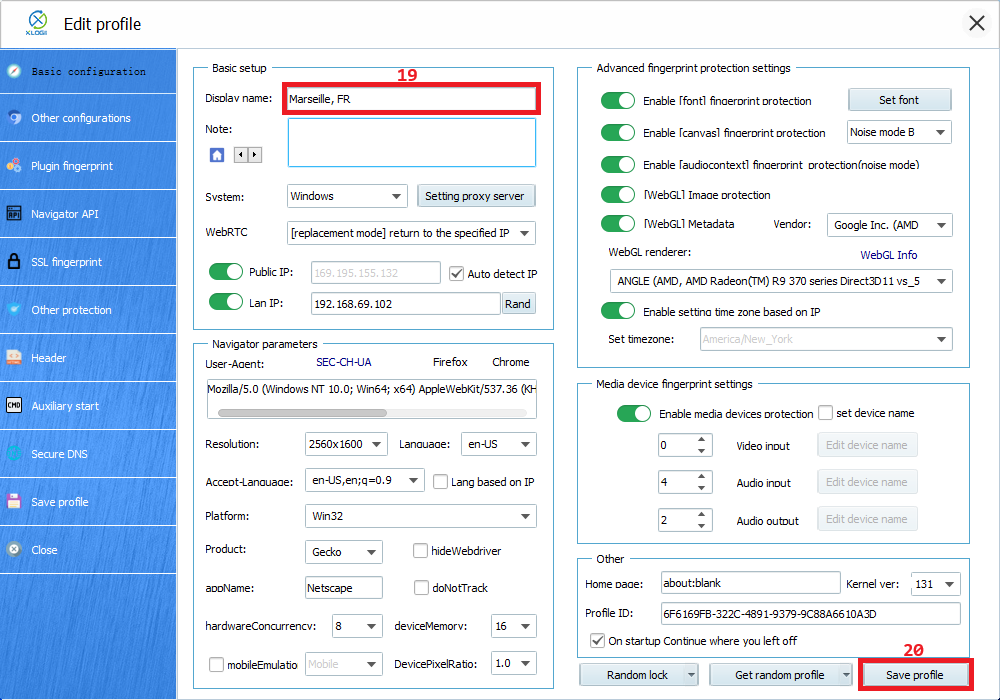
5. Back on the New browser profile screen, change any other required details, like the operating system, fingerprint protection settings, user agent, etc. Lastly, name your new profile in the Display name (19) box and click Save profile (20) at the bottom right of the XLogin browser.
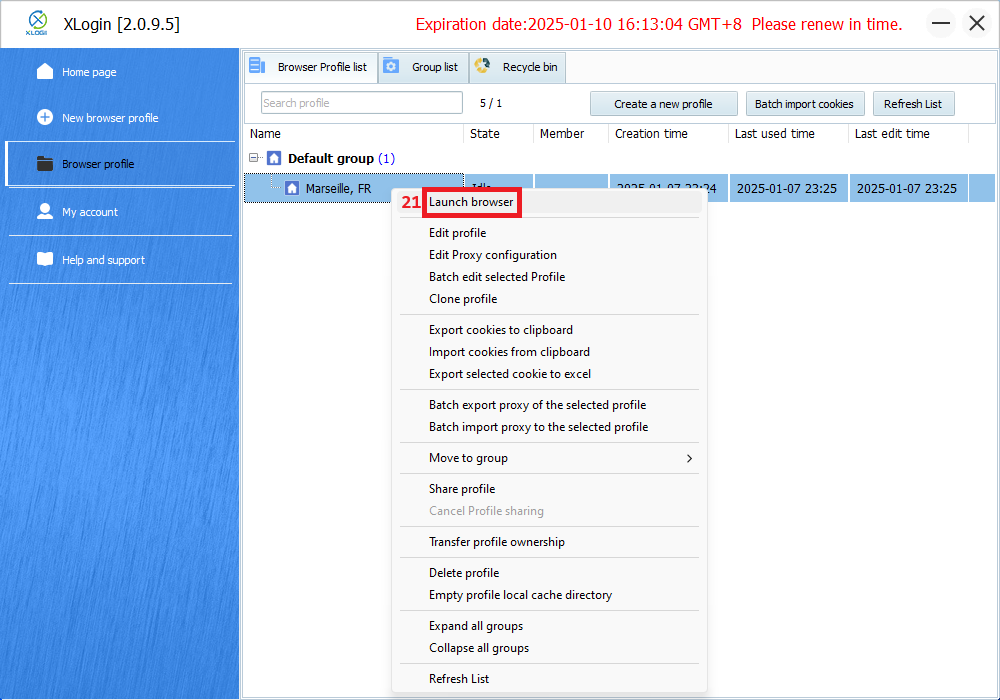
6. Now, your profile will appear in the section underneath, and you only have to right-click on it and choose Launch browser (21) to start browsing anonymously.
Note: XLogin browser has no proxy IP service, users need to purchase proxy IP from a third party. Third-party platforms provide proxy-related tutorials and are not related to the XLogin. Users are strictly prohibited from using XLogin to engage in any illegal and criminal activities, and users are responsible for the relevant responsibilities caused by using XLogin.