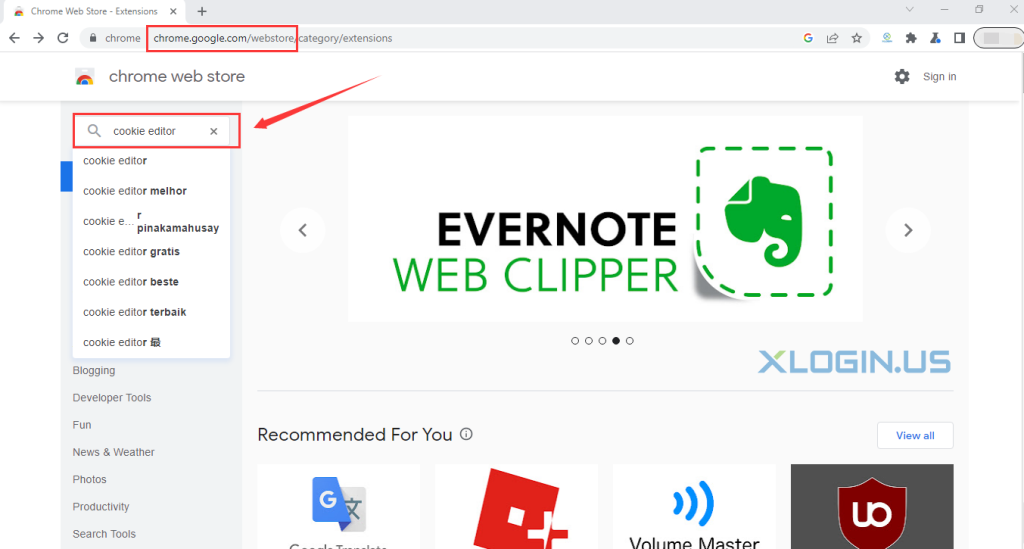
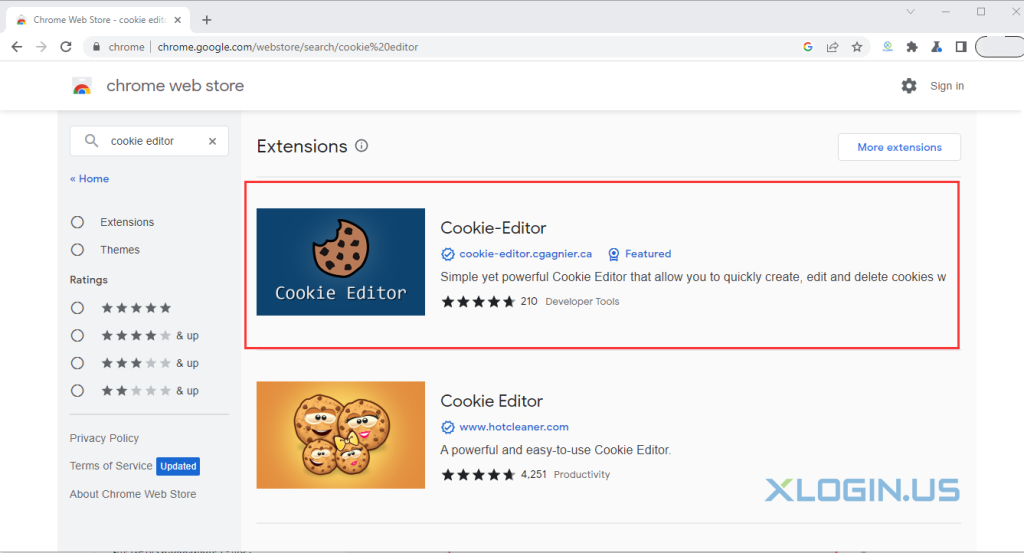
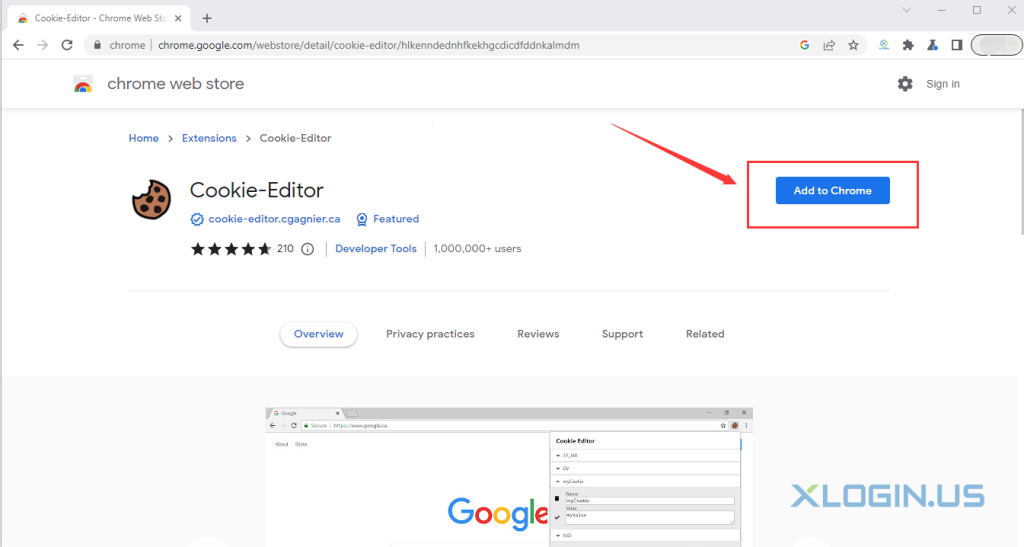
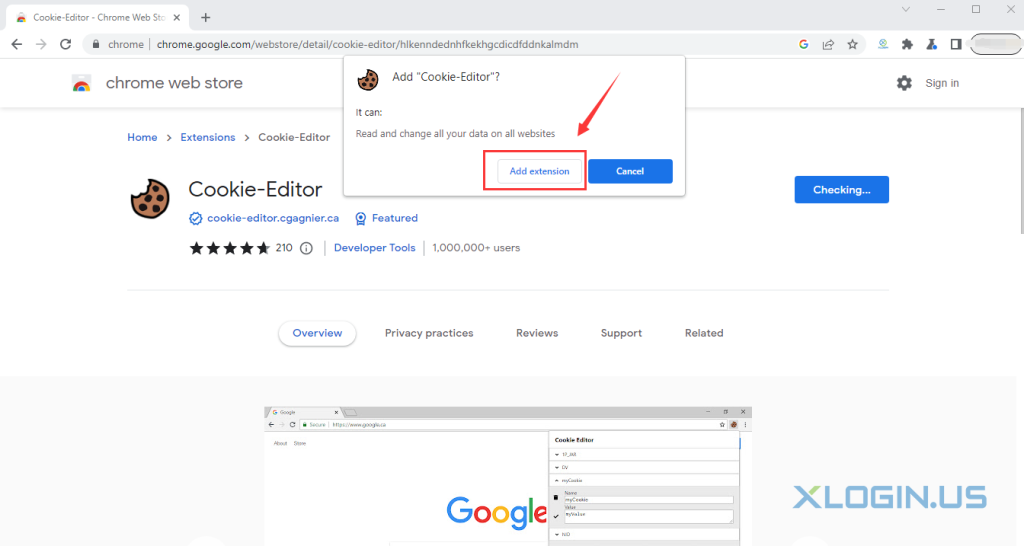
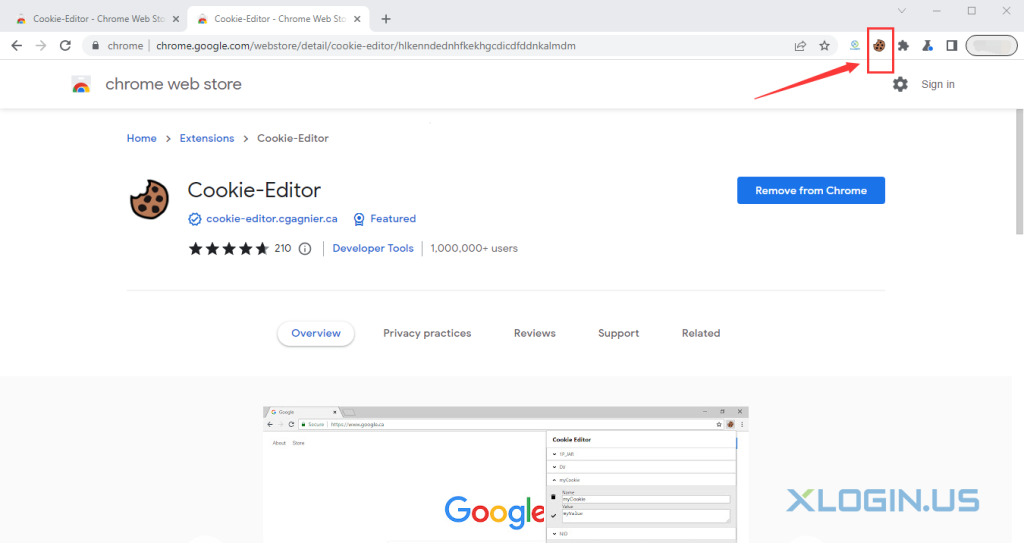
1. Install the extension you want to the browser.
For example: Cookie-Editor
Chrome web store -> Search bar -> Input Cookie-Editor -> Click Cookie-Editor -> Click "Add to Chrome" -> Click "Add extension" -> Added successfully.
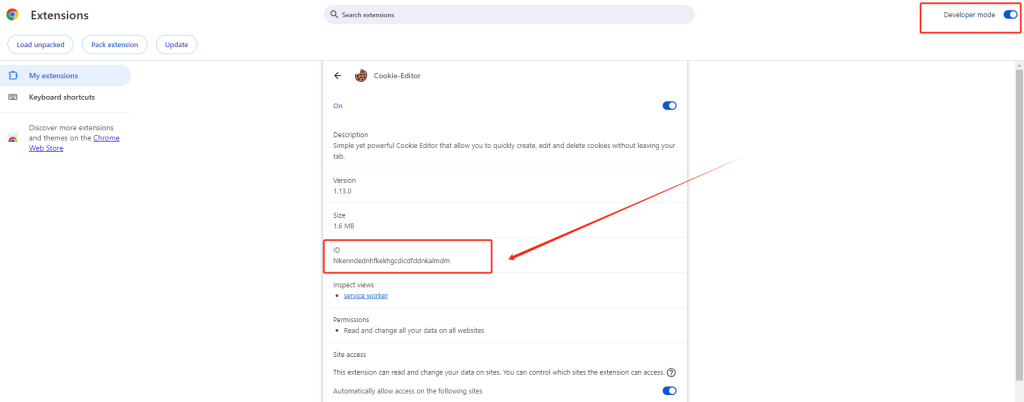
2. Find the plugin ID.
Chrome Extension management page -> Open "Developer mode" -> Cookie-Editor ID
3. Find the folder where the plugin is located.
The default location is:
C:\Users\"your user name"\AppData\Local\Google\Chrome\User
Data\Profile\Extensions
You can also find the Chrome installation location first, and then click "User Data" -> "Profile"-> "Extensions". Or copy and paste the plug-in ID on your computer to find its path.

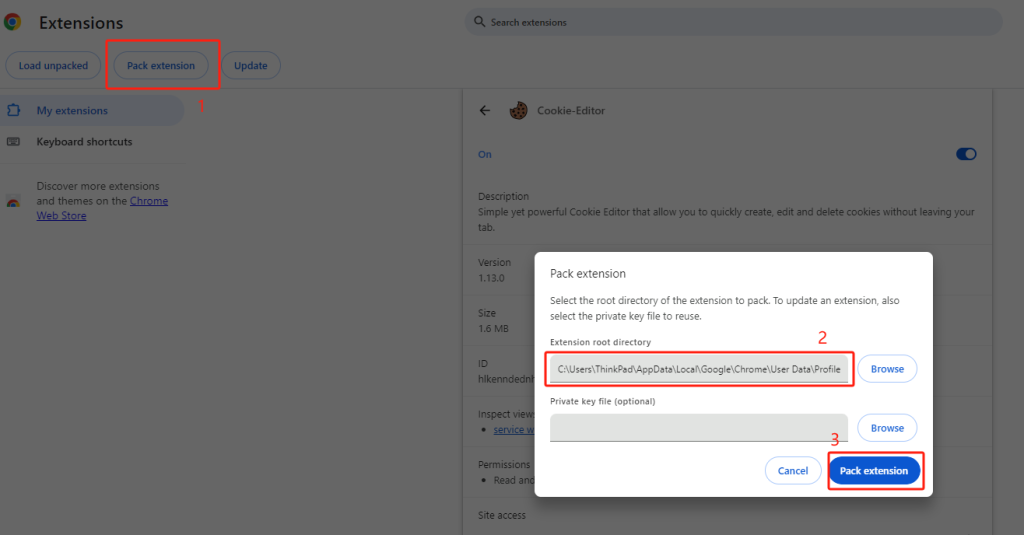
4. Back to the Chrome Extension management page.
Click "Pack extension" -> Enter/select the extension root directory, the root directory of the Cookie-Editor extension is the folder named with the version number under the extension ID directory in the Extensions directory of Chrome just found. Its ID is 1.13.0. -> Click "Pack extension" -> Click "OK".
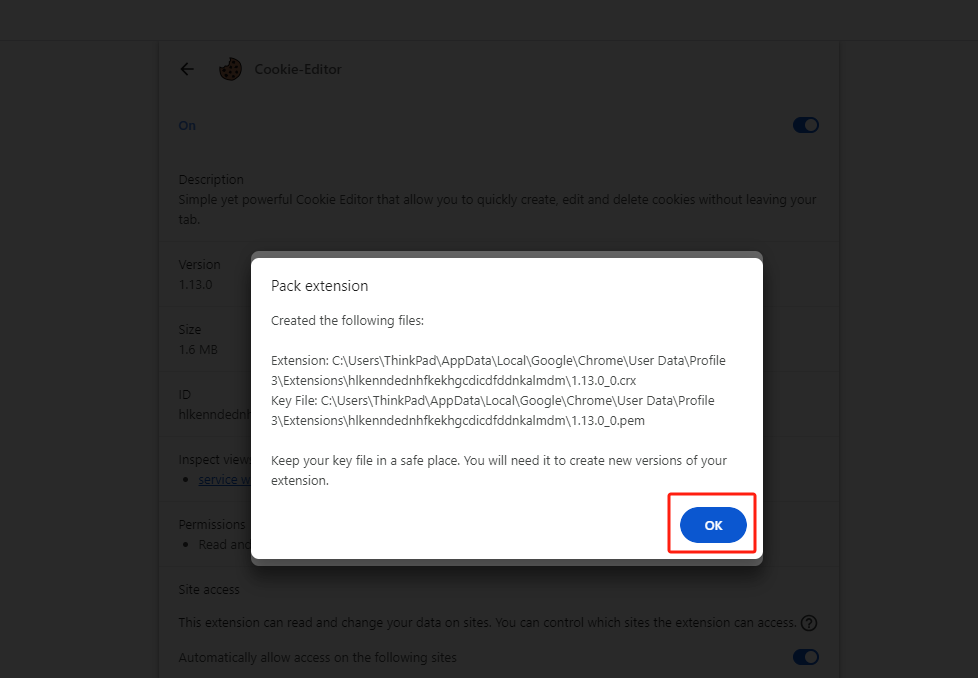
5. Packed the CRX file into ZIP format.

6. Unpack the ZIP file to the current folder, the name of the unpacked file can be changed to "Cookie-Editor"

7. "Cookie-Editor" files can be freely change the storage path and then copy the folder path.
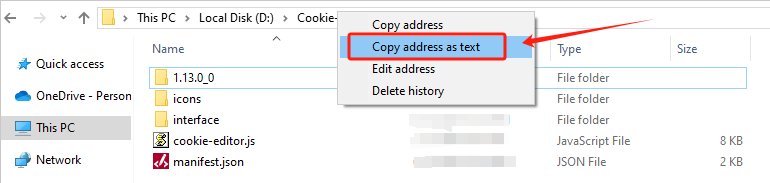
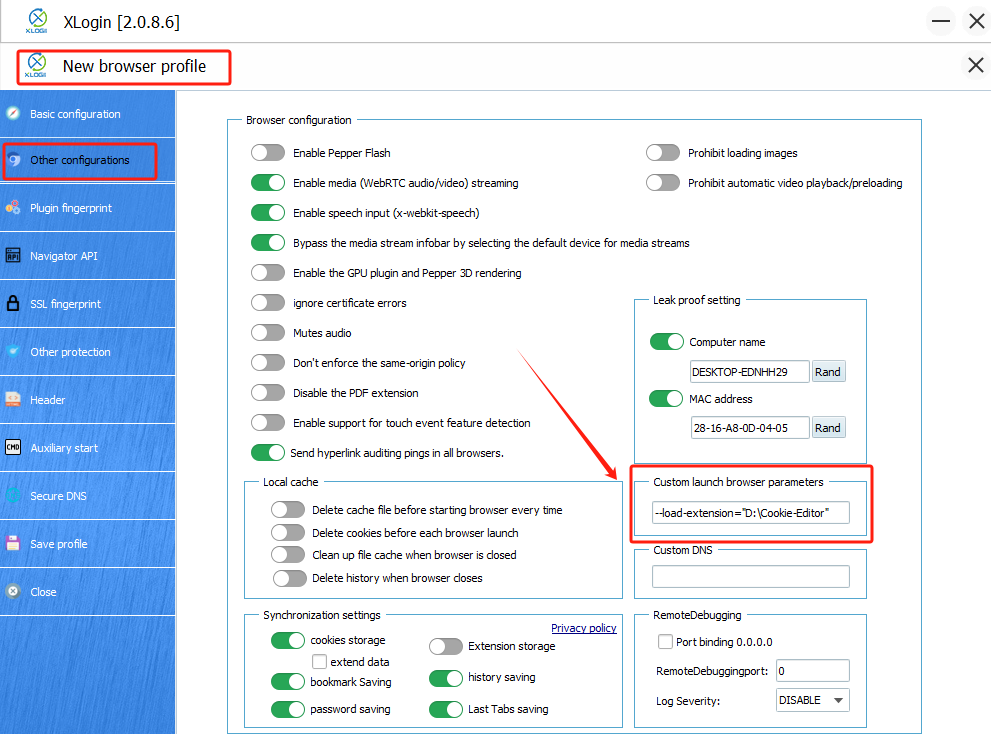
8. For example, the file path is "D:\Cookie-Editor", and then make the corresponding settings in XLogin, the plug-in can be added automatically.
9. XLogin browser batch-add Chrome plugins, please refer to :
"Batch-add Chrome plugins" Text Tutorial