Step 1: Configure Proxies in FlyProxy
Register and log in to FlyProxy
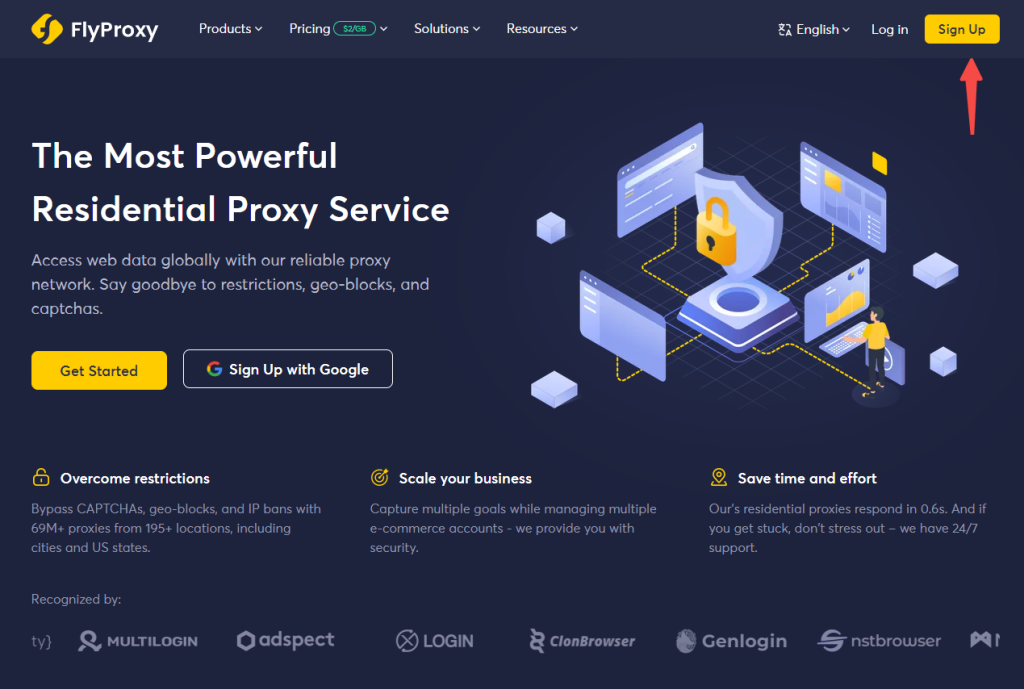
1. Open the FlyProxy website and click "Register" in the top right corner, or click here. Contact customer service to get free data.
2. There are two ways to register: sign in with your Google account or register with your email address.
3. First method: Log in with your Google account. Click "Log in with Google" below, select the Google account you want to log in with, and then click "OK" to log in automatically.
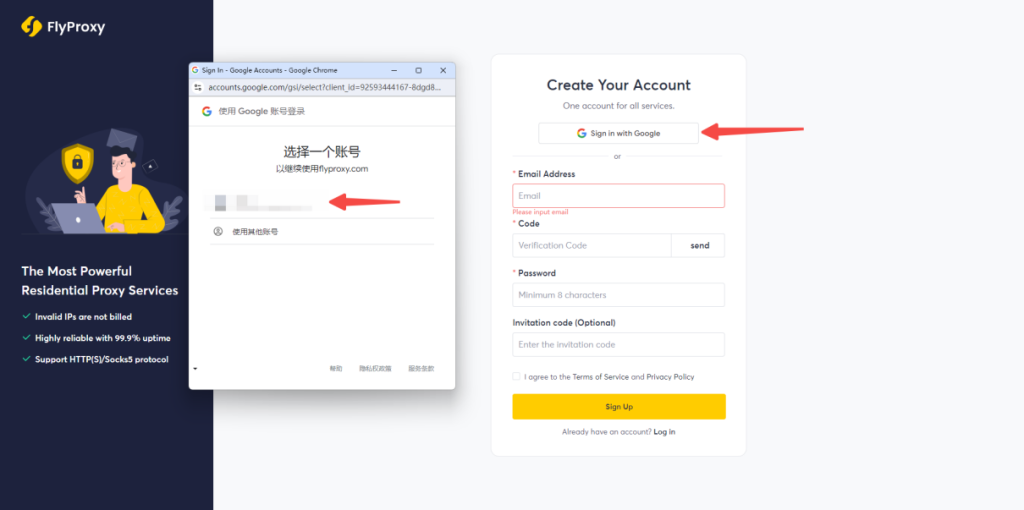
4. Second method: Register using your email address. Enter the email address you want to log in with, click "Send", and then enter the verification code you receive in your email.
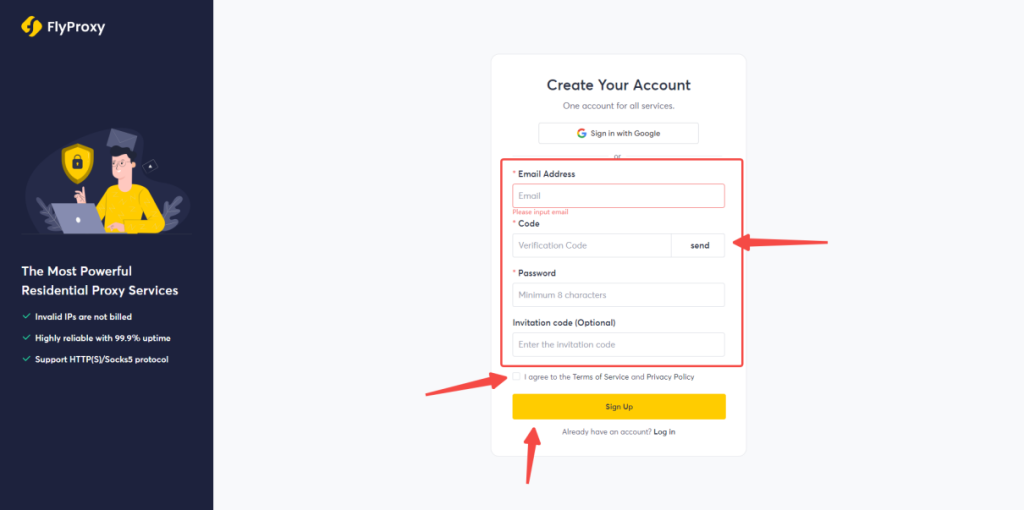
(1) Then set the password you want to use (the password is 8 to 20 letters or numbers). If you have an invitation code, you can enter it in the "Invitation code" box.
(2) Read the "Terms of Service and Privacy Policy" and check the box. Finally, click "Register" to register successfully and you will be automatically returned to the official website;
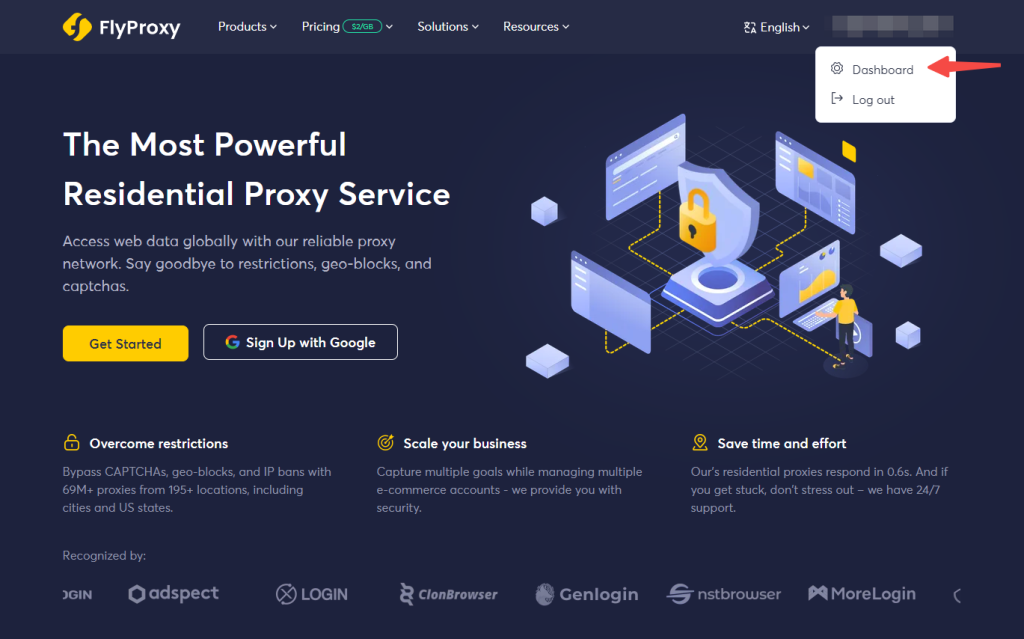
(3) Then use the "email address" and "password" you used to register to log in.
Residential Proxies User Auth & Pass Extraction Tutorial
FlyProxy has two ways to extract proxies: account and password extraction authentication & API Authentication
For detailed extraction methods, please refer to the [Proxy Extraction Tutorial]
Method 1: User Auth & Pass Extraction
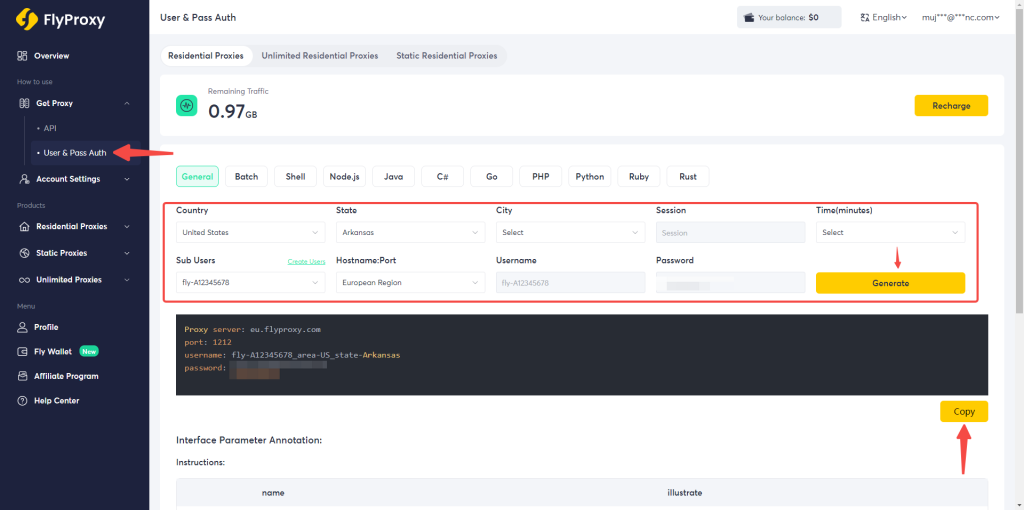
1. First go to the FlyProxy website and click on the Personal Centre in the upper right corner under your username.
2. Click on "User Auth & Pass Extraction" in the drop-down list of "Proxies".
(1) First, select the language of the generated code, then select the country you want to generate, and fill in the state or city and proxy address in turn. If you have a session time requirement, you can fill in your session content and rotation time.
(2) Then select the sub-user. For more information, please refer to the ["Create a sub-user tutorial"]. Then click on the right to generate, and click on the copy button below.
Method 2: Using API Extraction
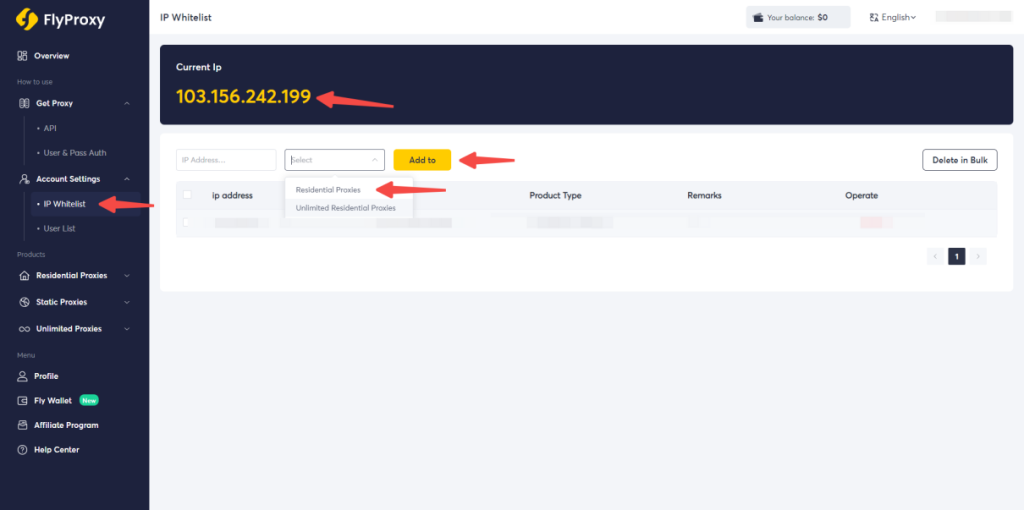
1. Before using API Extraction, you first need to add the device address to the whitelist.
(1) Click on the IP whitelist in the account settings drop-down bar, and the IP address of your device will automatically refresh.
(2) Copy the IP address above and paste it into the box below. Click on the right window, select the Proxies product from the drop-down list, and click "Add" on the right to add it successfully.
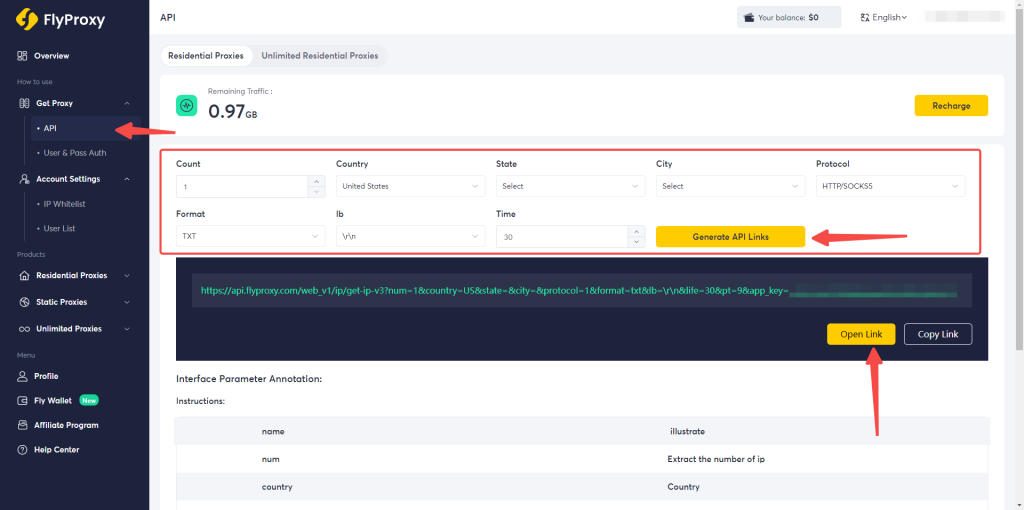
2. Click on "API" in the drop-down list of "Proxies" to select the number of IP addresses to be extracted, and then select the country where you want to generate the IP addresses.
(1) Fill in the state or city, format and delimiter in sequence. If you need to extract IP addresses at a specific time, you can fill in the extraction time in the "Life" column. The maximum single IP address extraction time is 7200 minutes.
(2) Here, we use the extraction of one IP address and 30 minutes as an example. Finally, click on "Generate AIP link" and then click on "Open link".
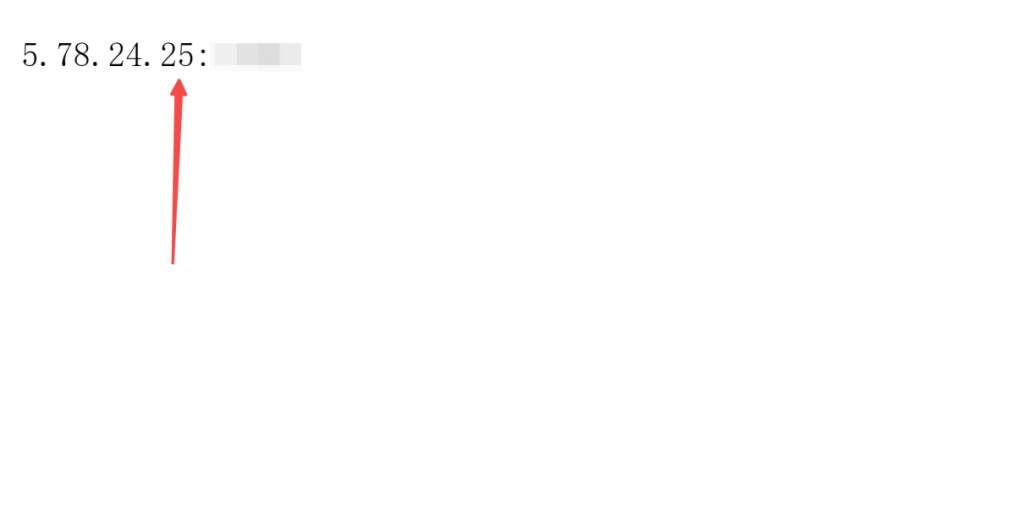
3. This is the Proxy Service address and port.
Step 2: Add the proxy settings in XLogin,Free trial available
1. Log in to the XLogin website, register, download and install.
(1) Log in to XLogin and open XLogin. XLogin supports free trials.
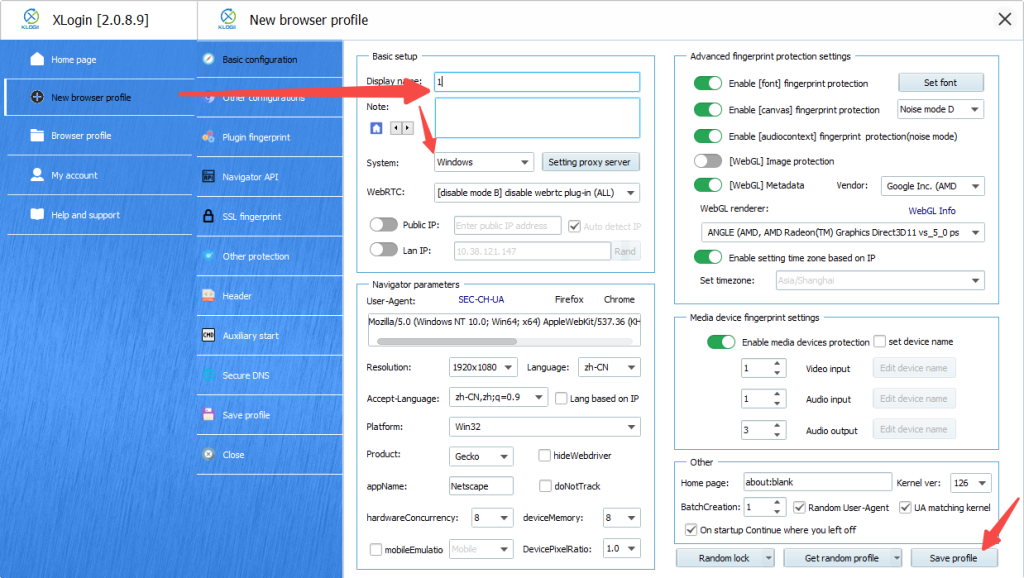
(2) Click "New browser profile" on the left, set "Display name" to select the operating system you want to use.
(3) Click "Save profile" in the lower right corner.
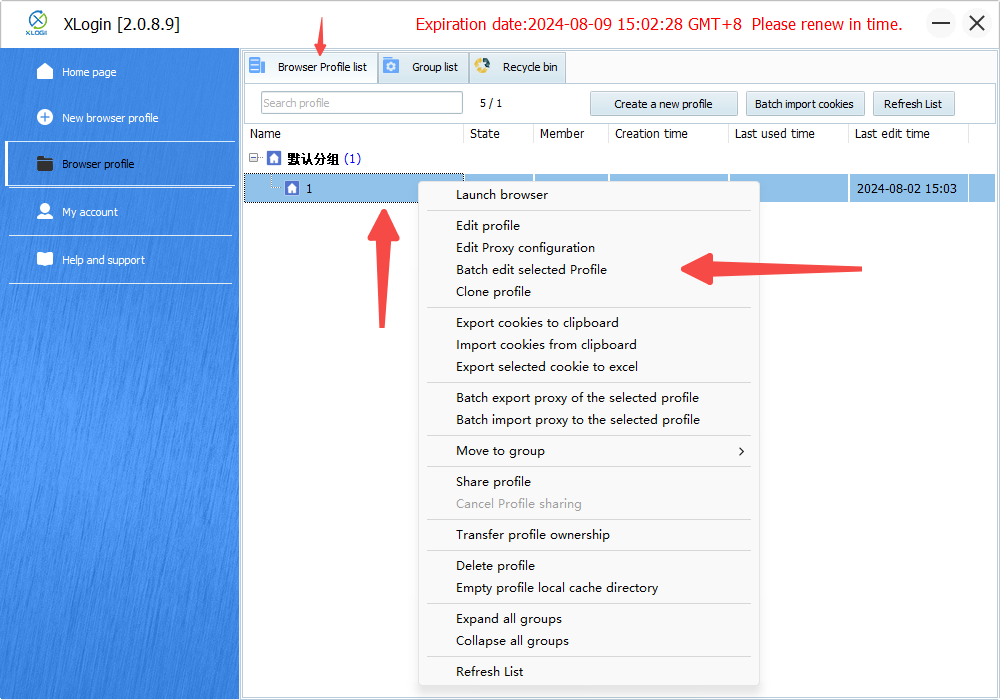
2. After clicking "Save settings", right-click on the proxy you just created and click "Edit proxy configuration".
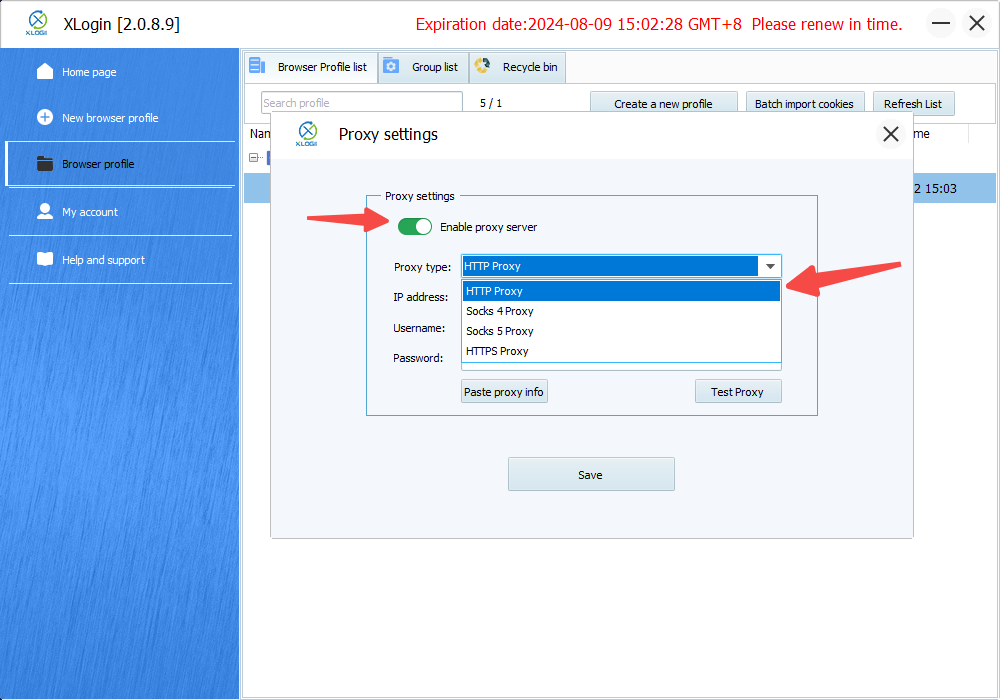
3. Turn on the "Enable proxy server" switch and select "HTTP Proxy" as the proxy type.
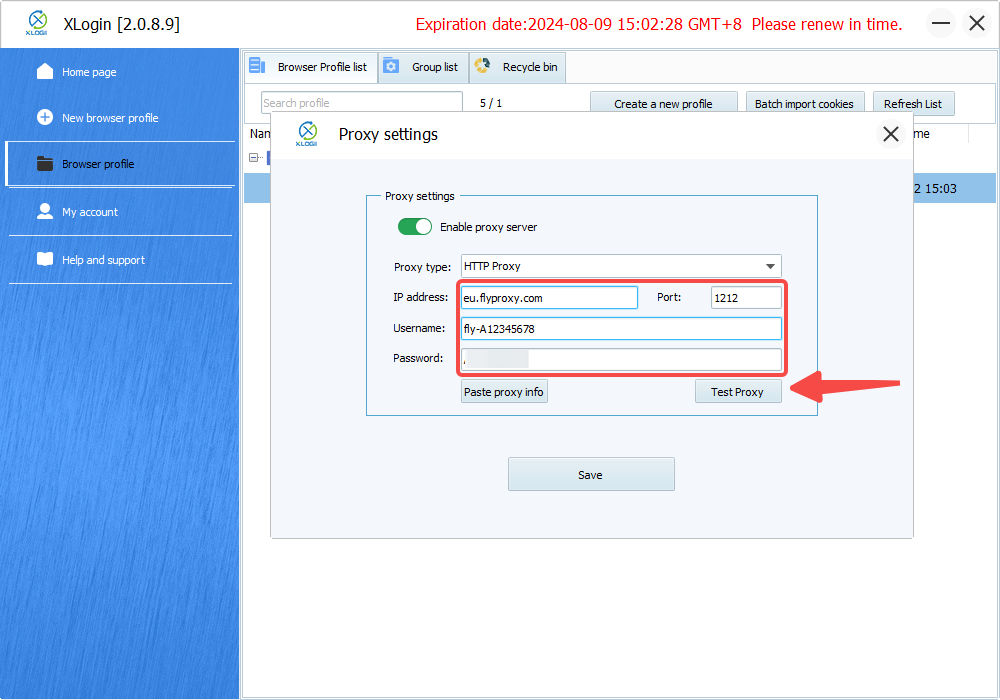
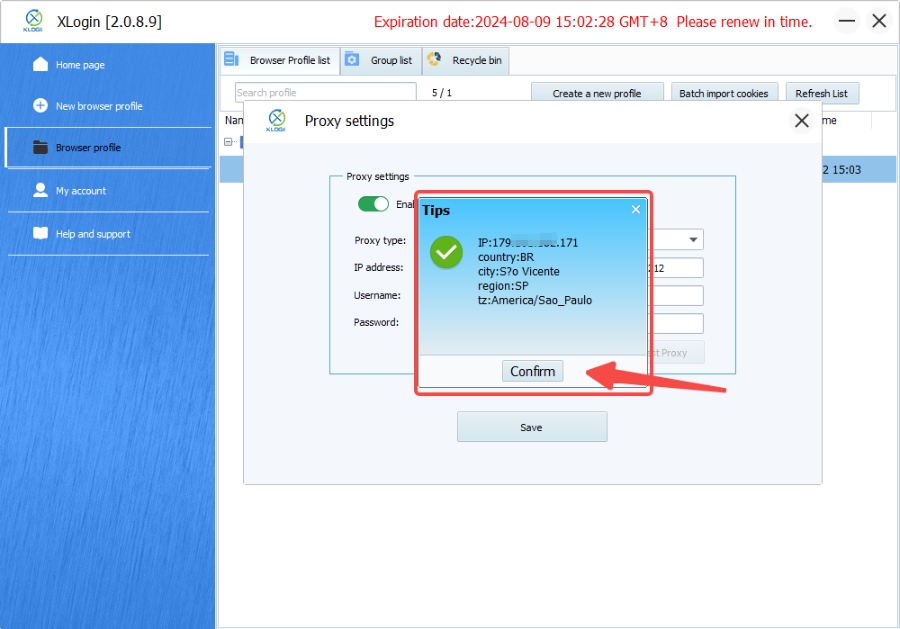
4. Then, paste the IP address, port, login user and login password just extracted from User Auth & Pass Extraction into the box and click "Test Proxy".
5. After the configuration is successful, the IP address provided by the service provider will appear. Click confirm.
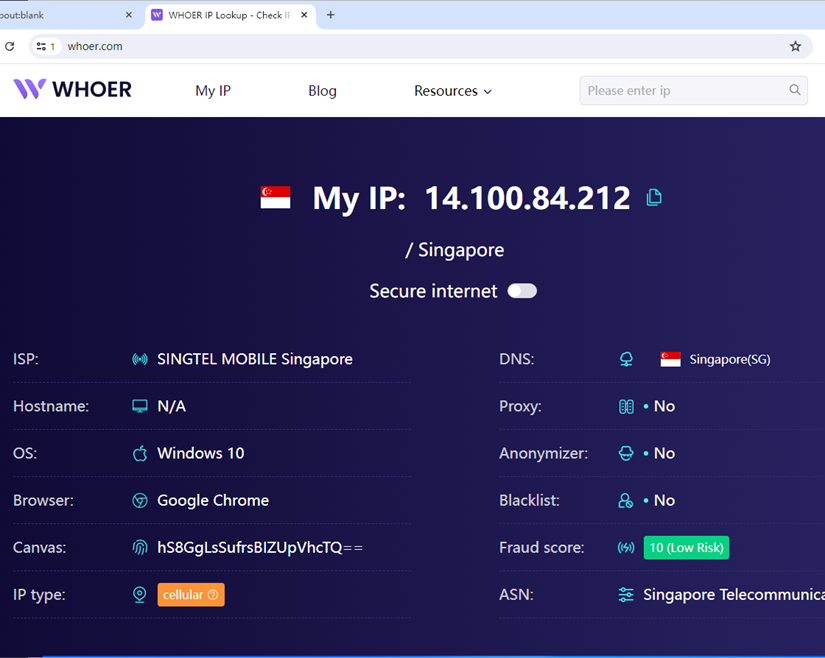
6. Return to the double-clicked Proxy browser that you just configured.
7. After double-clicking, a new browser window will be opened, and you can open Whoer.com in the window. If the IP address provided by the service provider appears, the configuration is successful.
Note: XLogin browser has no proxy IP service, users need to purchase proxy IP from a third party. Third-party platforms provide proxy-related tutorials and are not related to the XLogin. Users are strictly prohibited from using XLogin to engage in any illegal and criminal activities, and users are responsible for the relevant responsibilities caused by using XLogin.