
Add single plugin in single XLogin browser profile, take add Proxy Switchy Omega as an example.
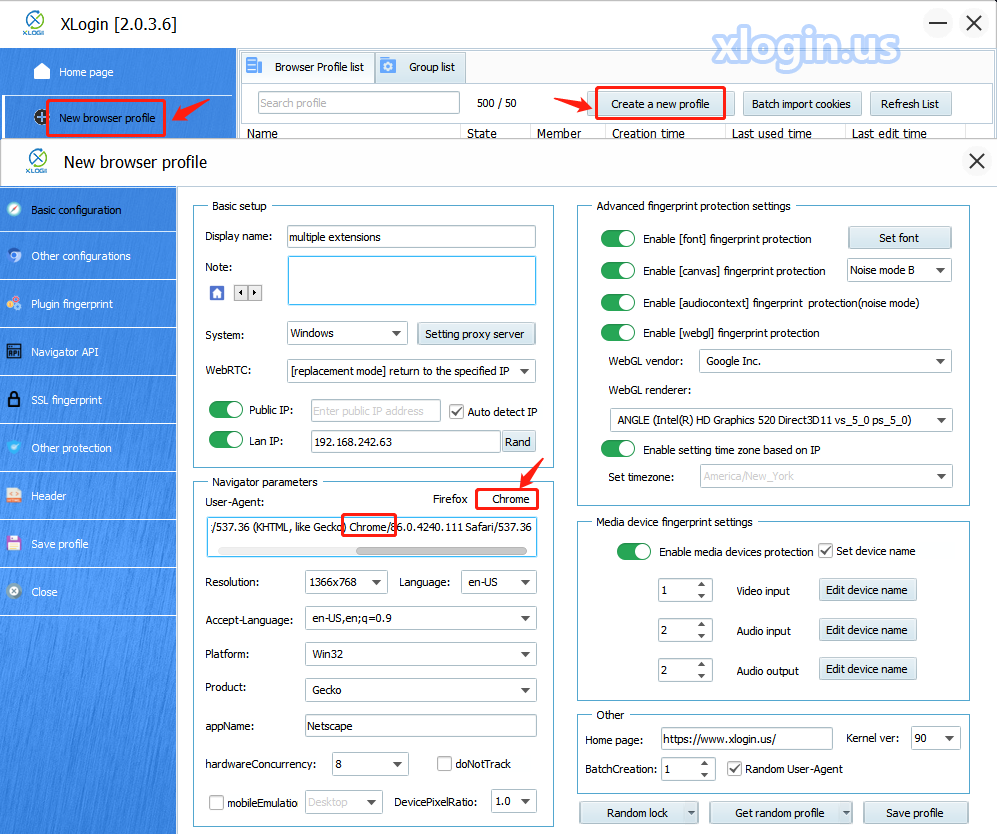
 Open XLogin client-> Create a new browser profile, you can click "New browser profile" or "Create new profile" to create a new browser profile.
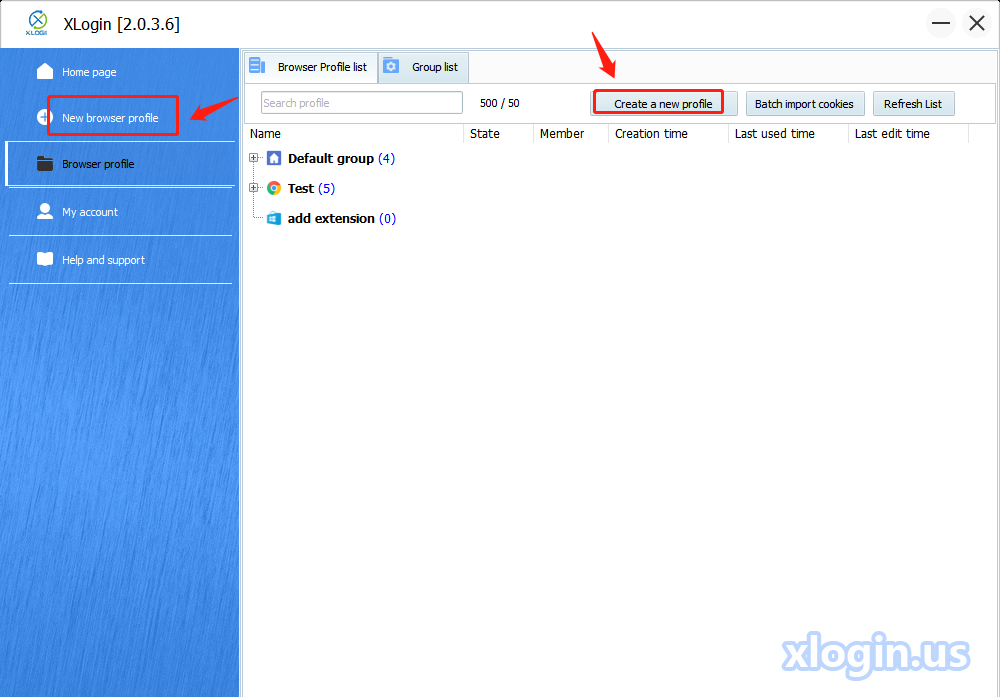
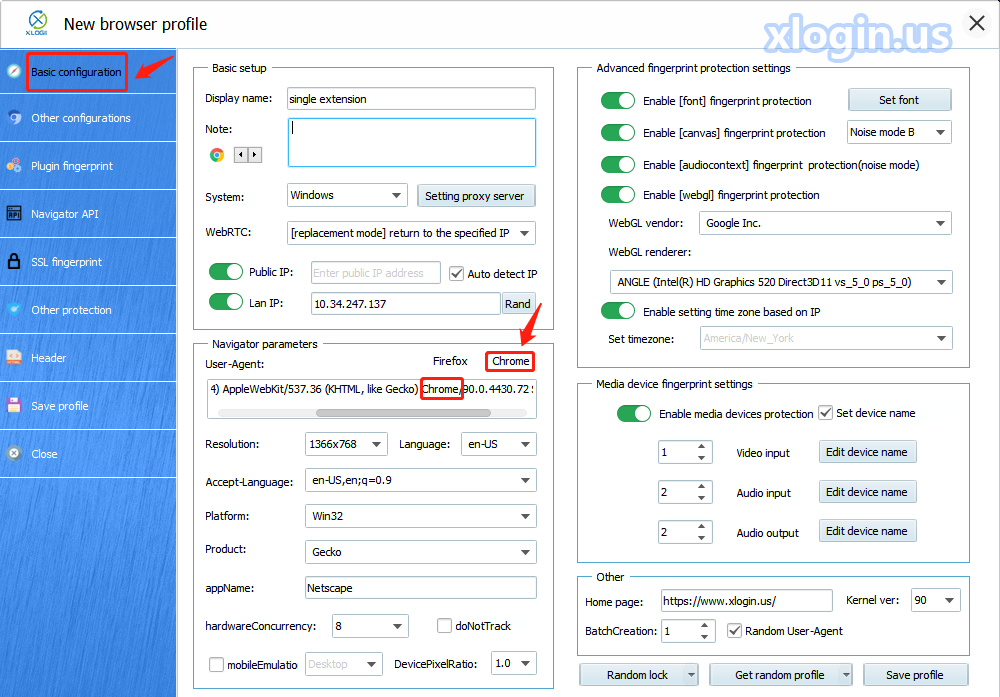
- Please note that the User-Agent of the browser profile must be Chrome, otherwise, the plugin cannot be added successfully.
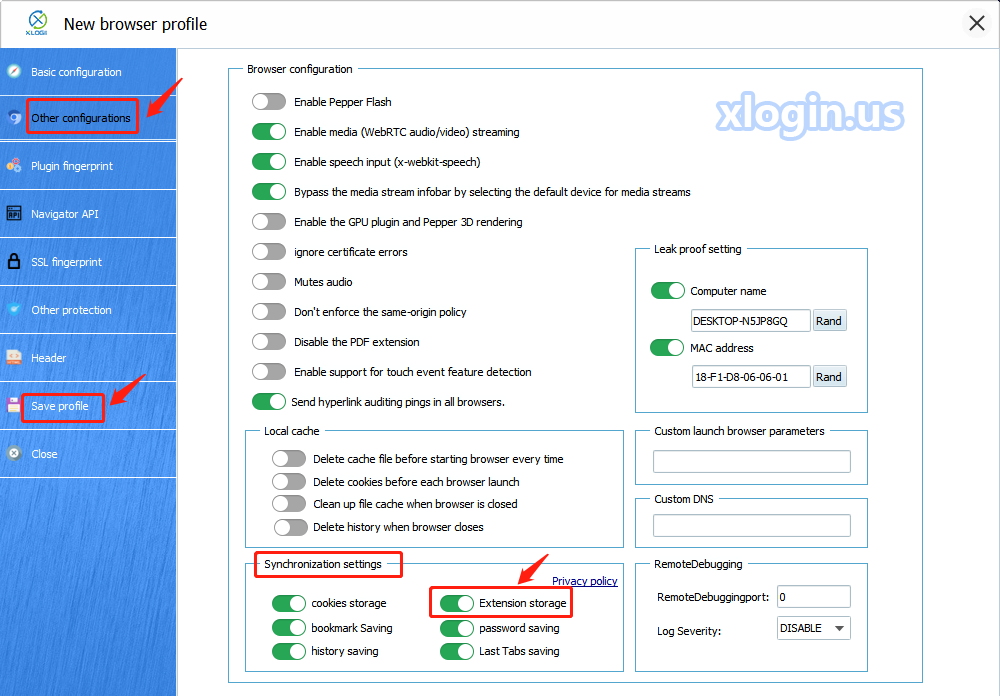
- Other configurations -> Synchronization settings ->Open Extension storage-> Save profile. Enable the Extension storage function and save it, after you share the browser profile to the sub-account or other accounts, when the receiver opens the browser profile, the plugin will be automatically added to the browser.
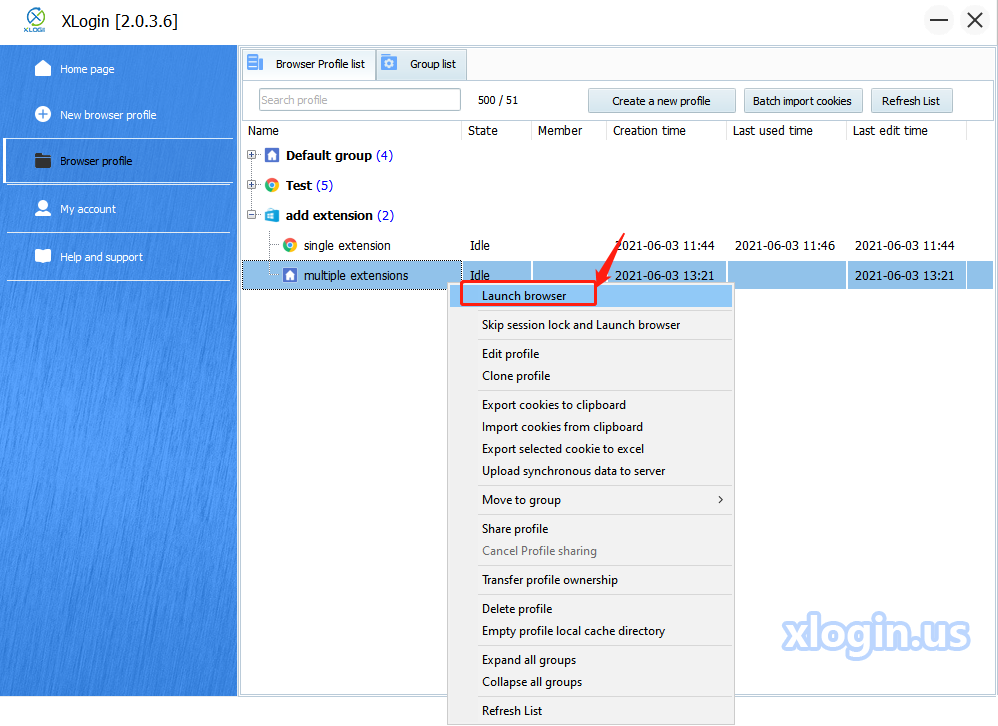
- Launch browser

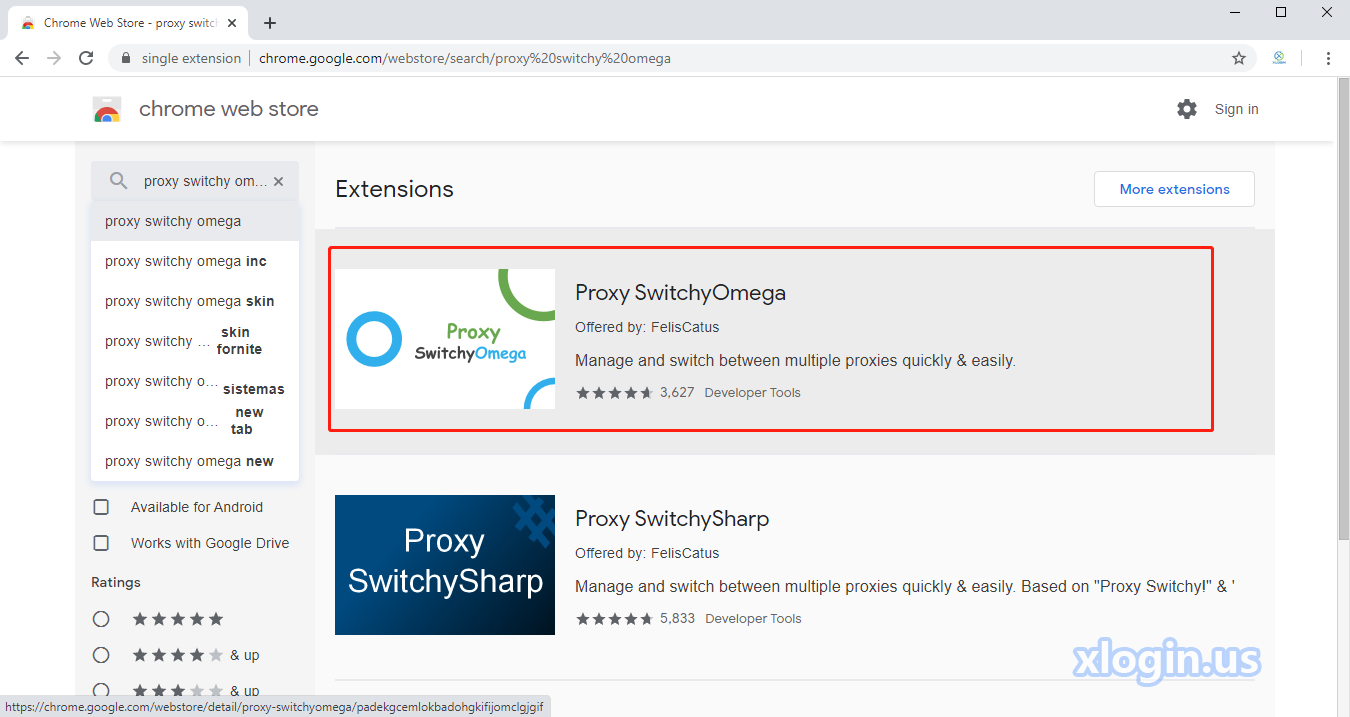
- Search for "Extensions" in the browser search bar, then open Chrome Web Store or copy the URL (https://chrome.google.com/webstore) directly to search for the plugin that you want to add to the browser, such as: "Proxy Switchy Omega".
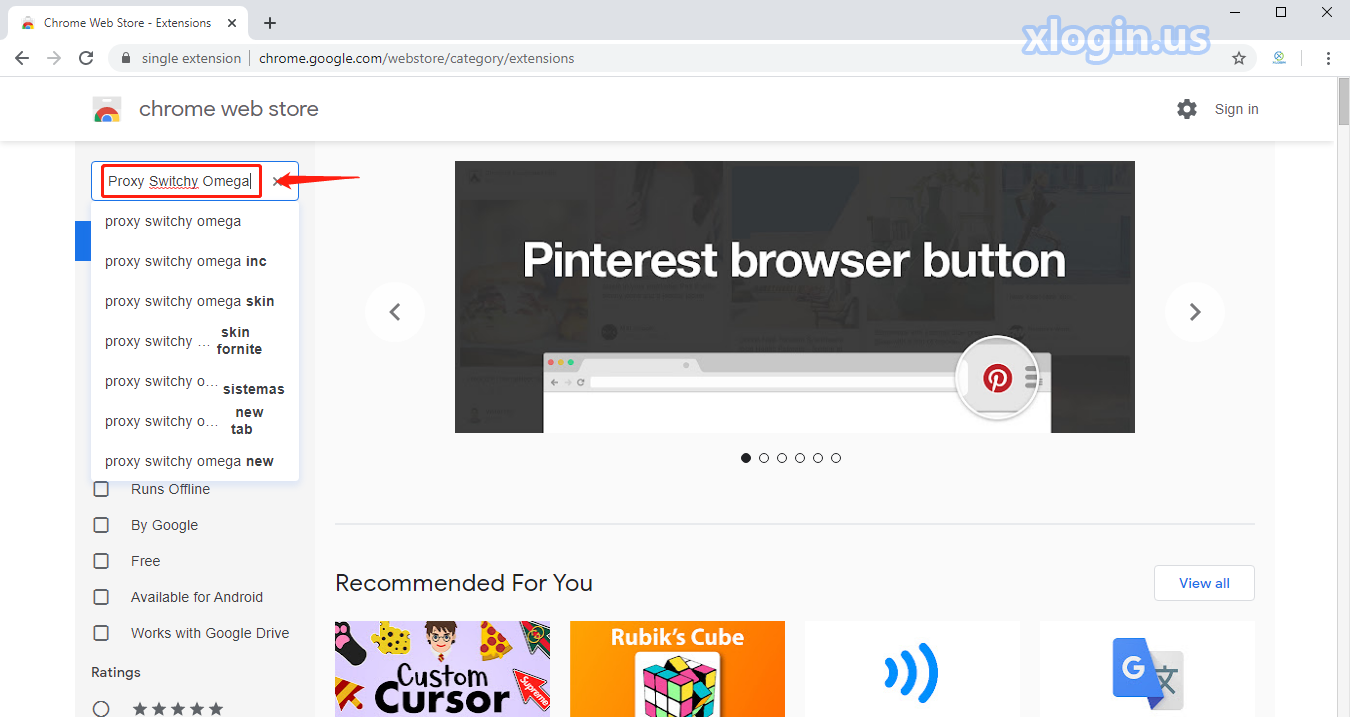
- Click Proxy Switchy Omega
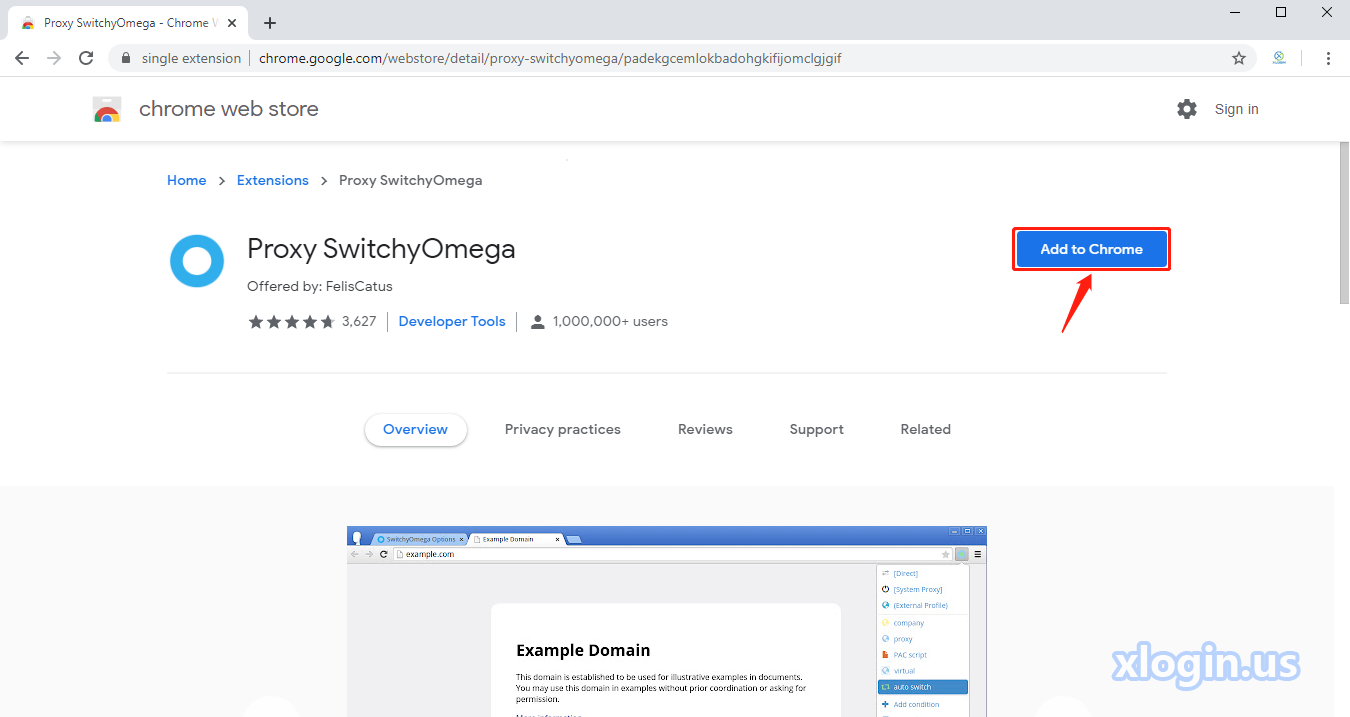
- Click "Add to Chrome"
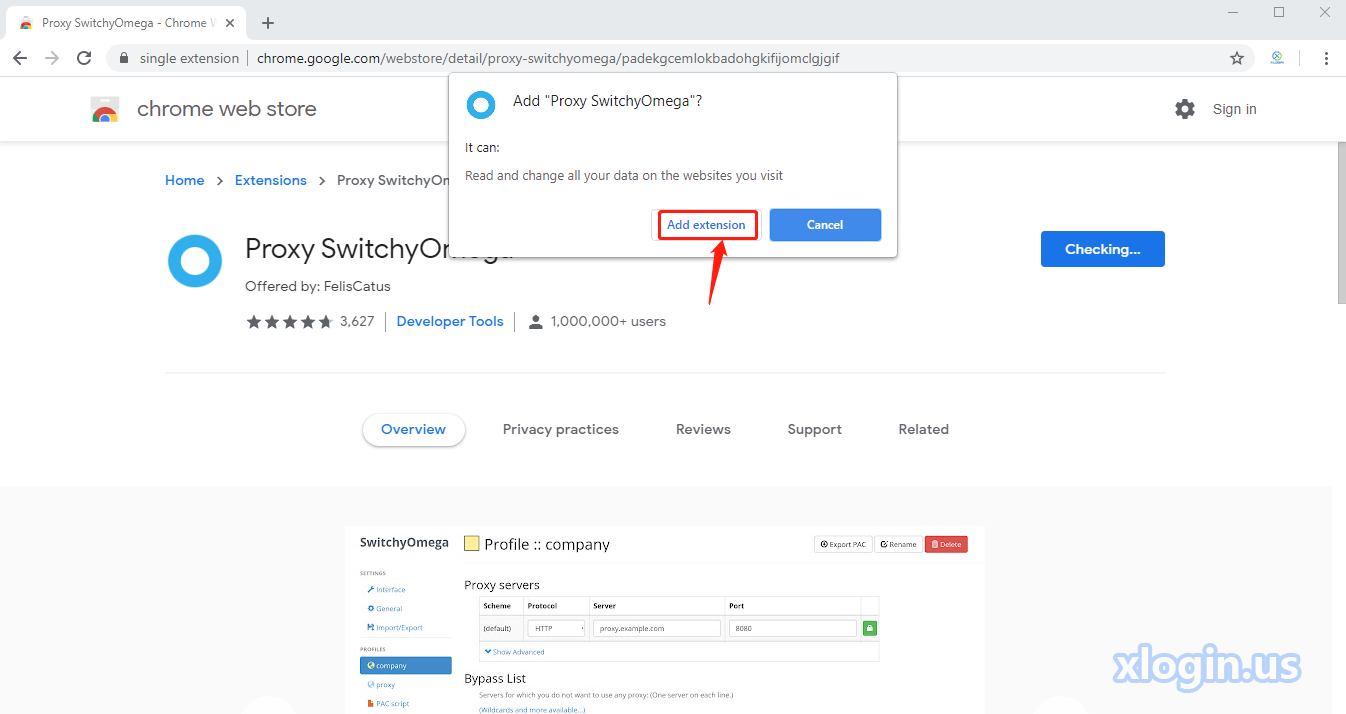
- Click "Add extension"
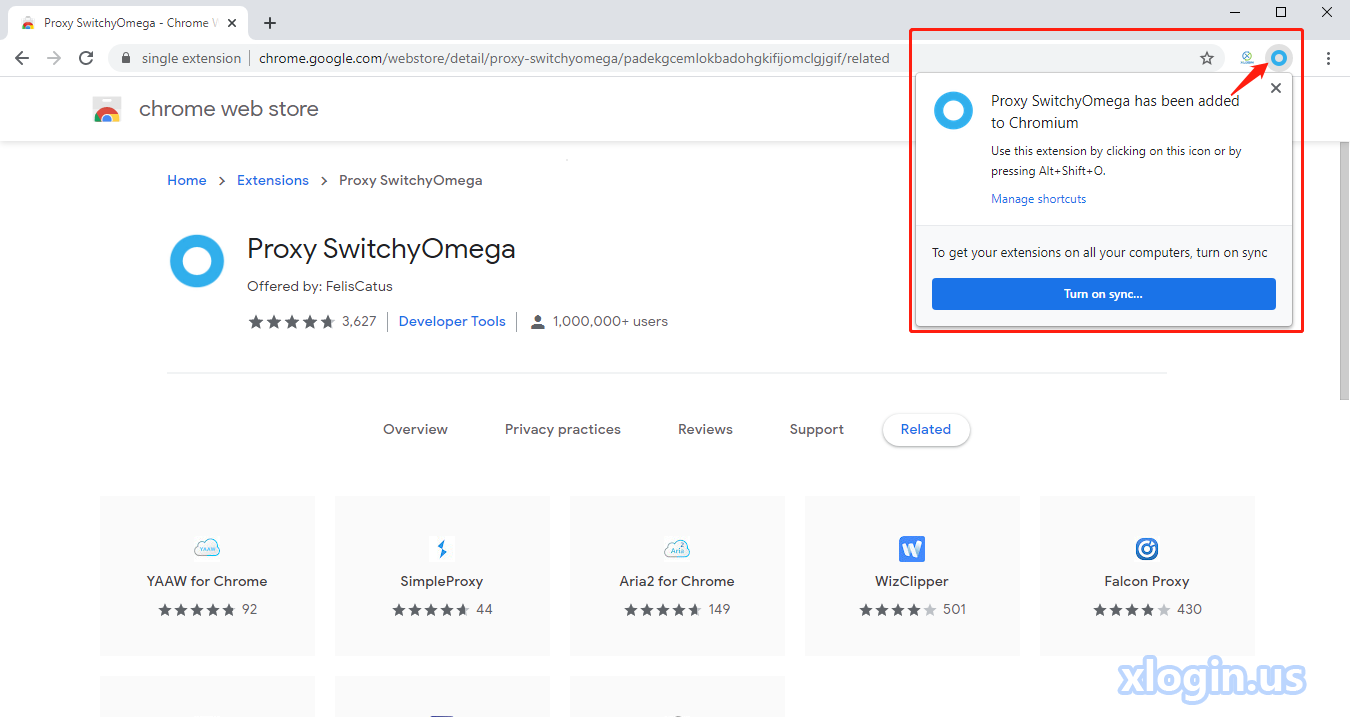
- Add the "Proxy Switchy Omega" extension successfully
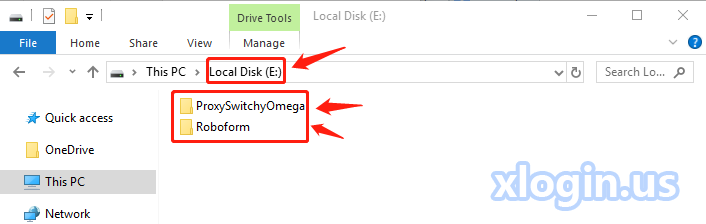
Add plugins in batches to multiple browser profiles in XLogin, take add "Proxy Switchy Omega" and "Roboform" extensions as an example.
- Pack “Proxy Switchy Omega" and "Roboform" extensions and store them on your local computer. Save them in Zip format and unzip them.
Proxy Switchy Omega download link: https://xlogin.us/uploads/ProxySwitchyOmega.zip
Roboform download link: https://xlogin.us/uploads/Roboform.zip
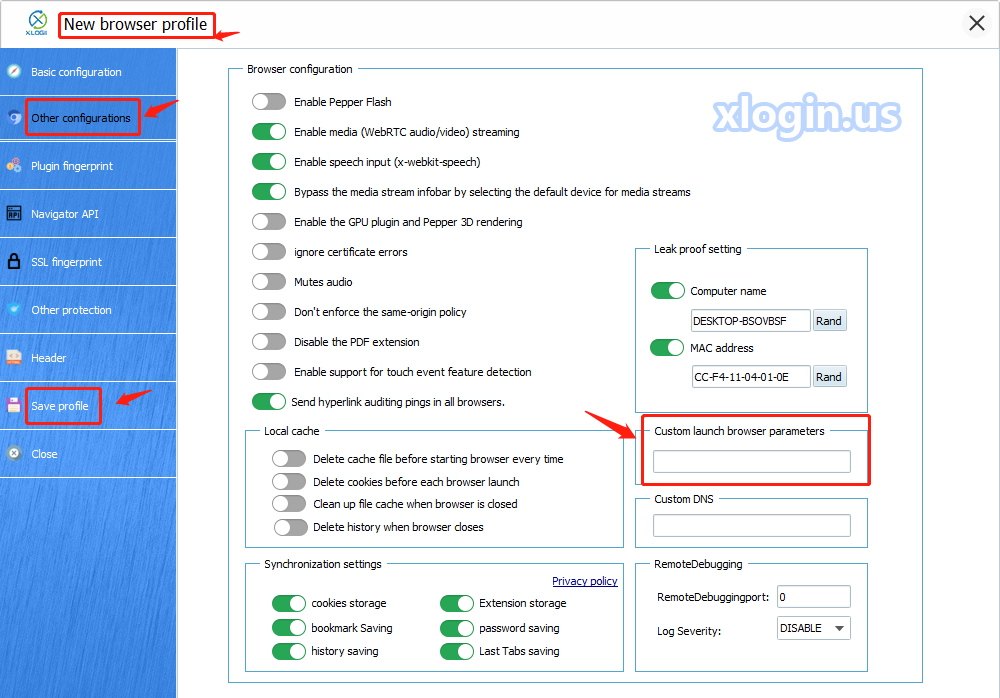
- Open the XLogin client, My Account -> Preferences -> Input Custom launch browser parameters-> Save, for example:
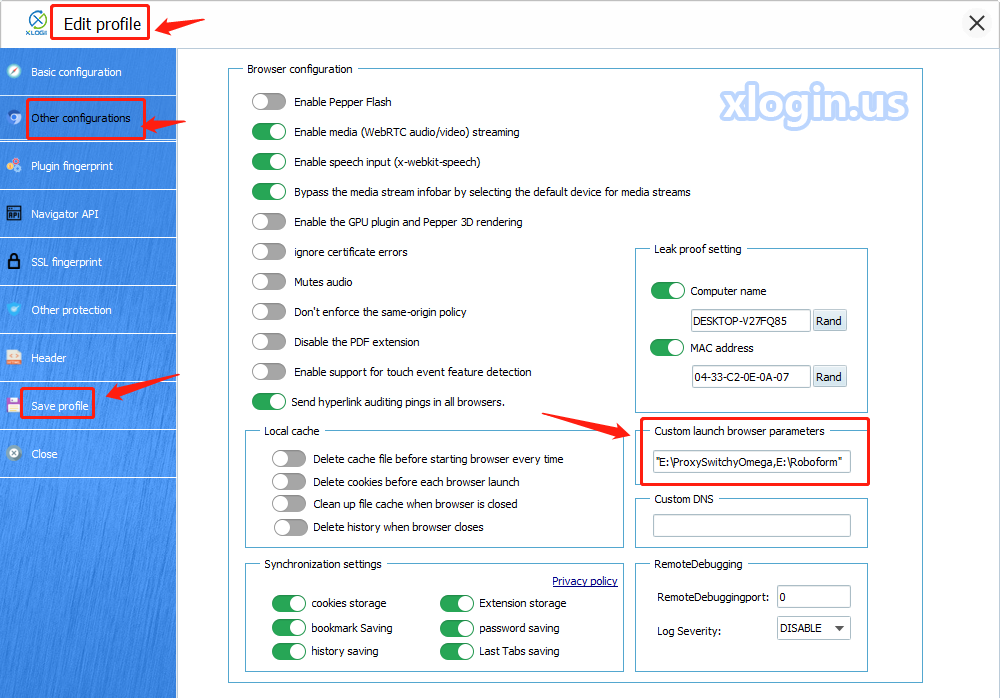
--load-extension="E:\ProxySwitchyOmega,E:\Roboform"

In the parameters: --load-extension="E:\ProxySwitchyOmega,E:\Roboform",
parameters"E:\ProxySwitchyOmega,E:\Roboform" means the path and folder names of the two extensions stored on the local computer.
- If you need to add multiple plugins, when you fill in the custom launch browser parameters, please separate the extension directories with a comma without spaces. After set in this way, when you create a new profile, the extension will be added to the browser automatically, you don’t need to add extensions one by one.
--load-extension="E:\ProxySwitchyOmega,E:\plugin2,E:\plugin3"
- Create a new browser profile
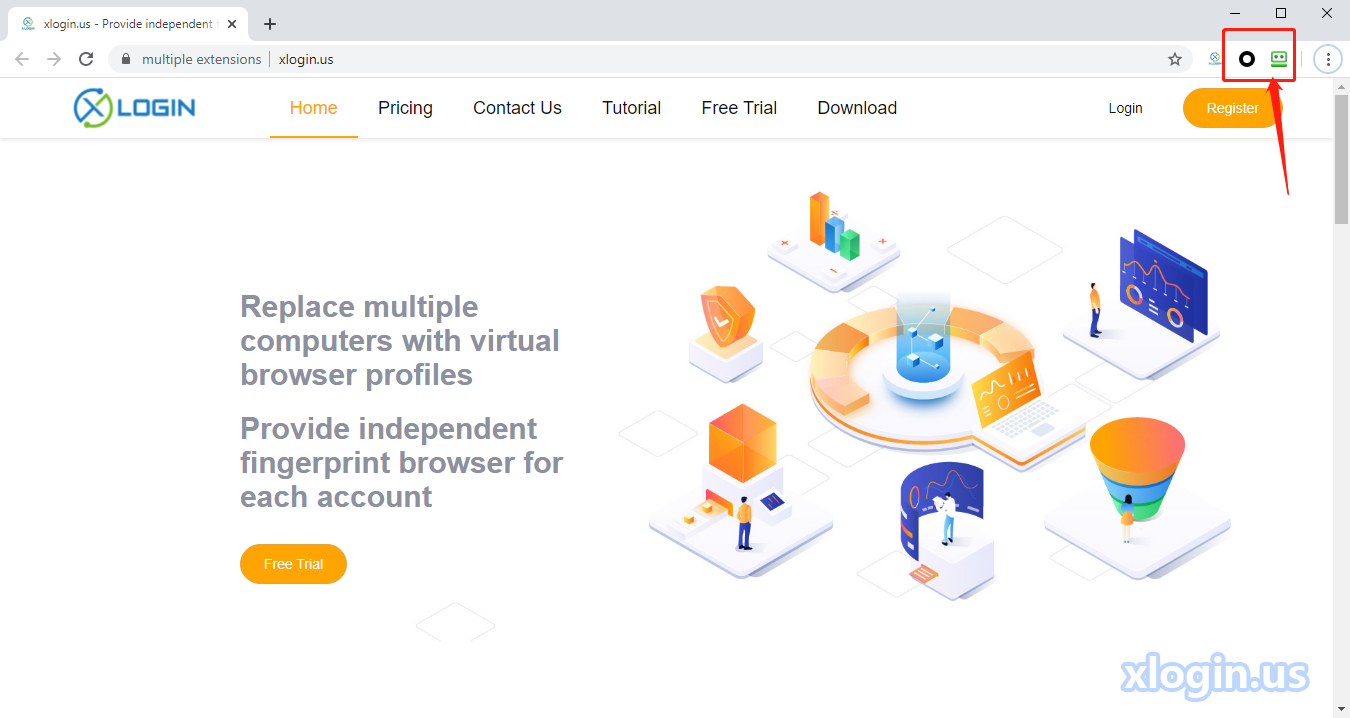
- Launch the browser
- Two extensions have been successfully added to the browser automatically.
① If you want the extensions added automatically in the old browser profile, please set in this way: right-click the old profile -> Edit profile -> Other configurations -> Custom launch browser parameters-> Copy and paste parameters -> Save
② If you don’t need the extensions automatically added to the newly created browser profile, you can refer to the method in article ① to delete the custom launch browser parameters, then save, and the extensions will not be added to the browser automatically when you launch the browser.
③ If you need to share the browser profile which installed multiple extensions to a sub-account or other accounts, the receiving end needs to store the extensions in the same path and same folder names on his/her computer, then the extensions will be added to the browser automatically when the receiving end launch the shared browser profile.
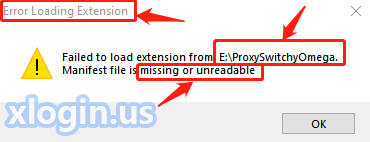
Note: If the receiving end doesn’t download, decompress and store the extensions to the same path, when he/she launches the shared browser profile, it will appear an error prompt as below screenshot. To fix this problem, please refer to article ③.
- To maximize the browser window when you launch the browser, please refer to the above setting method, the parameters is:
--start-maximized
- If you want to set the plug-in parameters and browser maximization parameters at the same time, please refer to the below information:
--load-extension="E:\ProxySwitchyOmega,E:\plugin2” --start-maximized
Note: