Open the website of smartproxy.
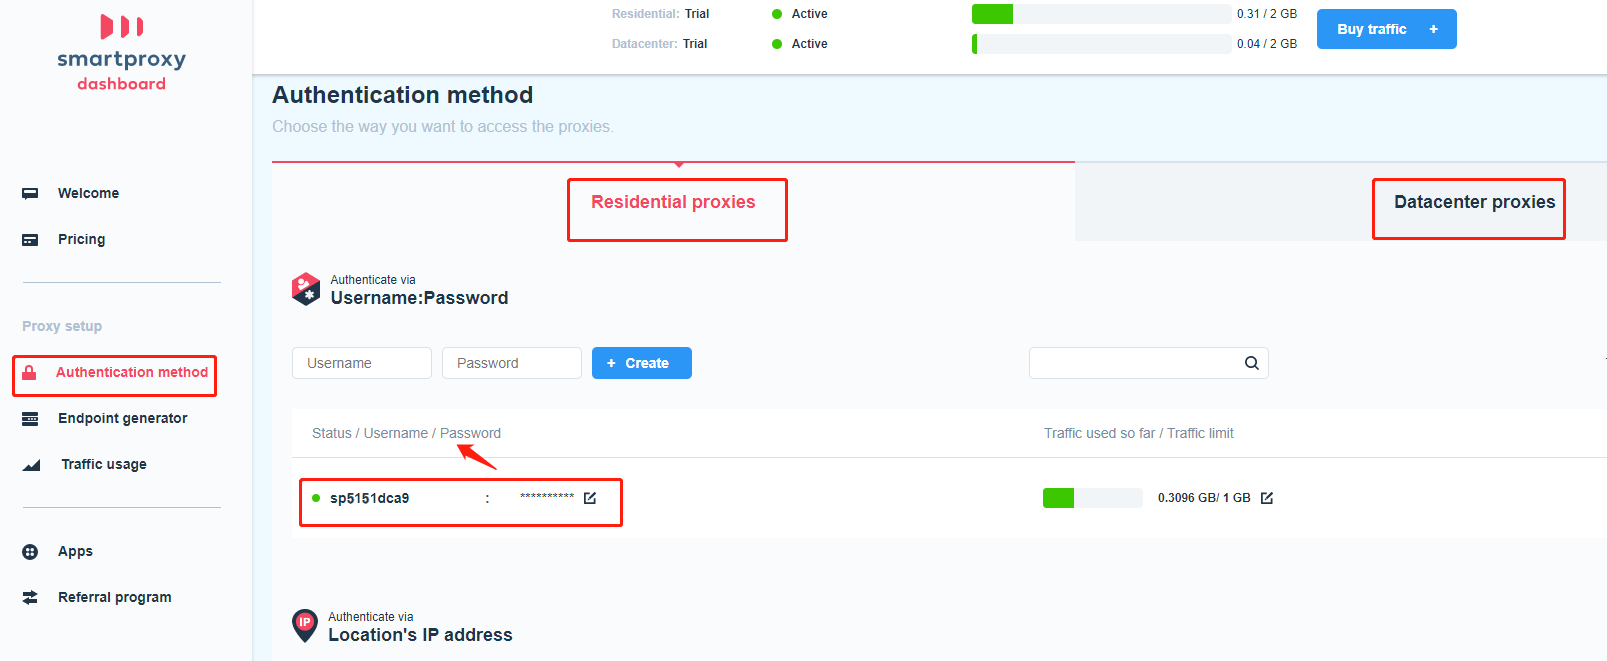
- Click the option of Authentication Method to create and check the proxy's username and password, the settings are same for Residential Proxies and Datacenter Proxies, As shown below:
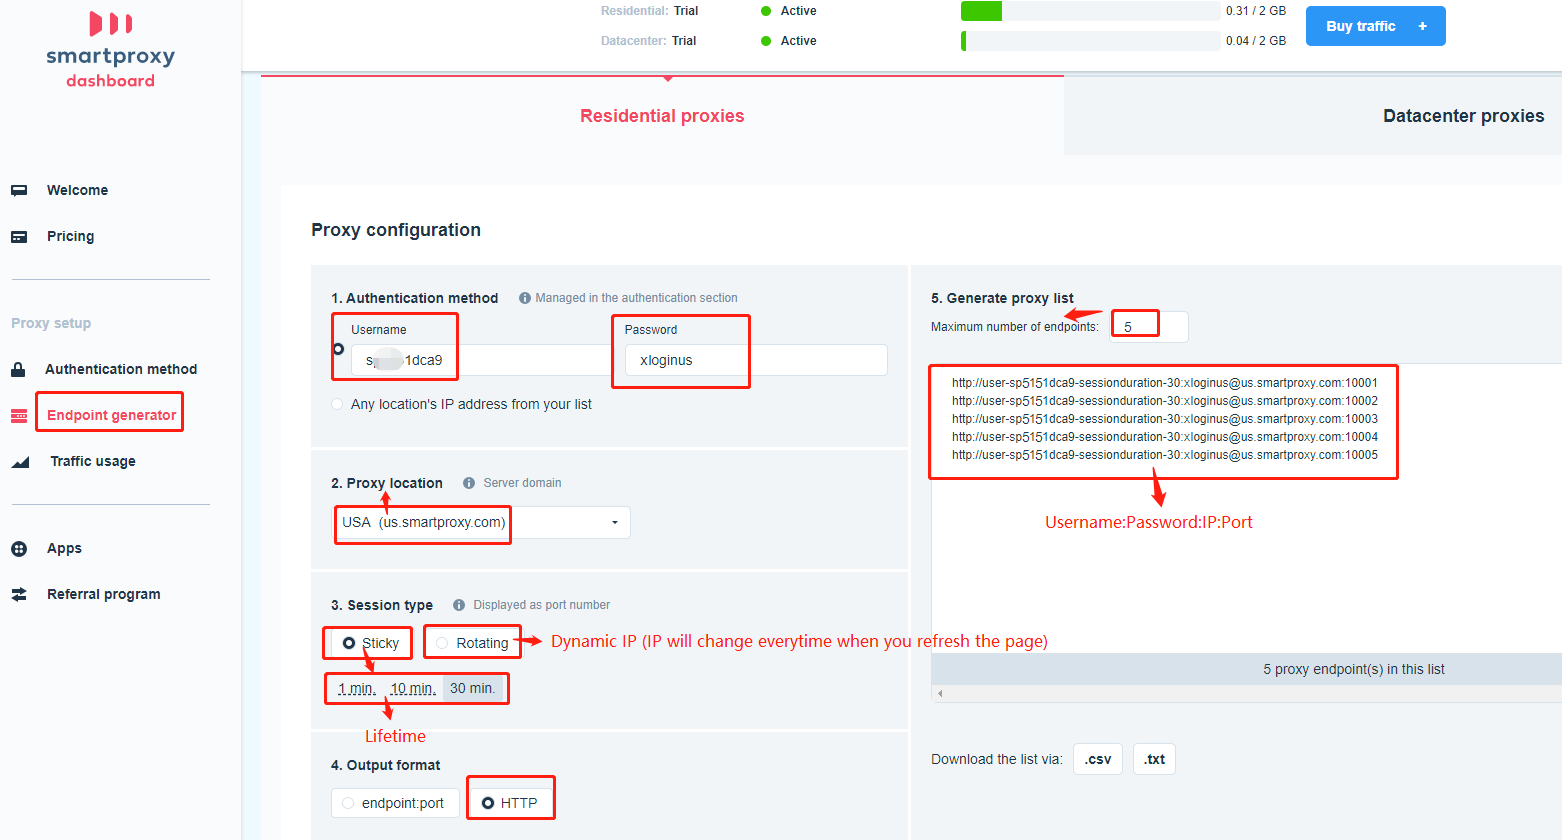
- Click Endpoint Generator to create multiple ports and IPs. Input the username and password->Choose the country->Sticky or Rotating->HTTP->Input the number of endpoints->Generate multiple ports and IPs. As shown below:
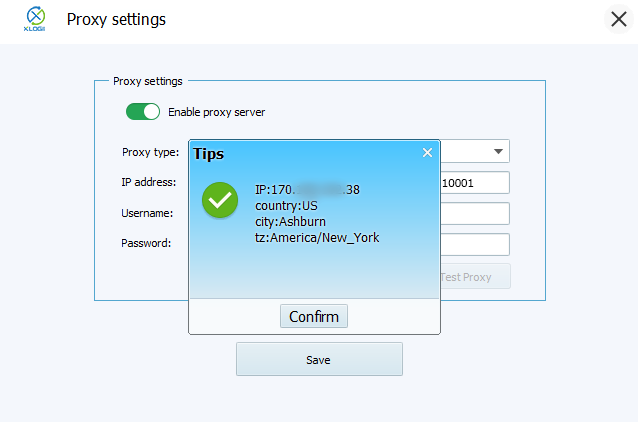
- Open XLogin profile->click “Setting proxy server”->HTTP->Input IP address:Port:Username:Password->Test Proxy->Save
DataCenter’s IP is gate.dc.smartproxy.com, Residential Proxies IP can be customized, you can select the country for your needs,Take the US as an example: us.smartproxy.com (us.visitxiangtan.com), ( If you test the proxy failed, please try to change the "smartproxy" to "visitxiangtan" in IP address), port 10001 ( check the port on the dashboard of Smartproxy), Input the account and password to successfully connection.
Note:the Username will change depending on the country, session type,IP duration, you can check it on the dashboard of Smartproxy. For example: we choose “Sticky”, “30min”, the username will be “user-sp5151dca9-sessionduration-30”, Rotating and Datacenter’s username are same as “gate.dc.smartproxy.com”. As shown below:

- Click “TestProxy”, a tips shows the IP information, save the settings and then you can open the browser to test the HTTP proxy.